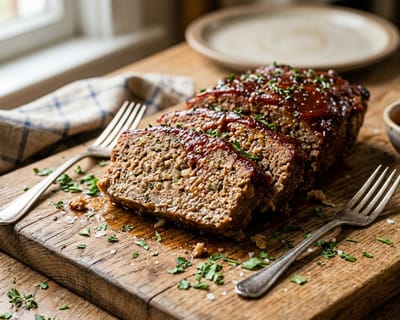
Classic Homemade Meatloaf with Sweet Tangy Glaze
Tender, juicy homemade meatloaf made with an 80/20 ground beef chuck blend, a milk-soaked panko panade, sweet sautéed onions, and a glossy, caramelized brown sugar and ketchup glaze.
Key Takeaways
- ✓Ready in just 1 hr 5 mins using straightforward, kitchen-tested technique.
- ✓Delivers 28g of muscle-fueling protein per serving for lasting satiety.
- ✓Portion-balanced at 410 calories per serving with wholesome, unrefined ingredients.
- ✓Masterclass temperature checkpoints ensure maximum tenderness and flavor development.
The Story
Homemade meatloaf has been an anchor of American comfort food for over a century. A well-executed meatloaf offers a tender, sliceable texture that stays moist from edge to center, balanced by deep savory alliums, rich beef fat, and a sticky, caramelized sweet and tangy glaze.
Yet meatloaf has an unfortunate reputation among diners who have suffered through dry, gray bricks of overcooked beef, or conversely, greasy loaves that crumble into wet mush the moment a knife touches them.
Making a juicy, cohesive meatloaf is not a matter of luck; it is a matter of food science. By employing a milk-soaked panade, respecting protein mixing limits, sautéing the aromatics to manage moisture, baking free-form on a rimmed sheet pan, and staging the glaze application, you can create a classic meatloaf that slices cleanly and stays succulent even when reheated the next day.
The Evolution of American Meatloaf
Meatloaf in its modern form developed from a convergence of nineteenth-century agricultural industrialization and practical home economics.
While chopped meat dishes have existed since Roman times—the first-century culinary manuscript Apicius contains recipes for minced meat patties combined with bread and wine—modern American meatloaf owes its existence to the invention of the mechanical hand-cranked meat grinder in the late 1860s. Prior to the grinder, chopping meat into fine pieces required laborious manual work with heavy cleavers. Grinders allowed butcher shops and home cooks to quickly turn tough, fibrous, inexpensive cuts of beef into tender ground meat.
During the late nineteenth and early twentieth centuries, domestic science schools and cookbook authors such as Fannie Farmer began publishing standardized recipes for baked loaves of minced beef, pork, and veal mixed with breadcrumbs, eggs, and milk.
The Great Depression of the 1930s cemented meatloaf as a permanent fixture in American homes. Faced with economic hardship and strict food budgeting, cooks stretched small, affordable portions of ground beef by incorporating generous quantities of breadcrumbs, crushed saltine crackers, or rolled oats.
In the post-World War II era, the proliferation of canned tomato products, prepared condiments, and commercial ketchup led to the classic sweet and tangy tomato-brown sugar glaze that characterizes traditional American meatloaf today.
Meat Composition: Why Fat Ratios Dictate Tenderness
The foundation of any meatloaf is the ground meat itself. The single most common mistake made by modern cooks is selecting extra-lean ground beef (such as 90/10 ground sirloin or 93/7 ground round) in an attempt to make the dish leaner.
Ground beef is categorized by its lean-to-fat ratio:
- 90/10 or 93/7 (Ground Sirloin / Round): Contains only 7% to 10% fat. When baked for an hour in an oven, the lean muscle fibers contract tightly. Because there is insufficient intermuscular fat to lubricate the protein fibers, the loaf dries out, resulting in a dense, hard, crumbly texture.
- 85/15 (Ground Round / Chuck): An acceptable middle ground, but can lean dry if baked even a few minutes past 160°F.
- 80/20 (Ground Chuck): The gold standard for homemade meatloaf. Ground chuck comes from the well-exercised shoulder region of the cow, providing rich, beefy flavor and roughly 20% intramuscular fat. As the meatloaf bakes, this fat melts gradually throughout the meat matrix, basting the interior fibers and keeping the loaf juicy, succulent, and tender.
The Beef and Pork Blend
For enhanced tenderness and moisture retention, culinary tradition favors a blend of 75% ground beef chuck and 25% ground pork (or equal parts beef, pork, and veal, historically sold as "meatloaf mix").Pork contains a higher concentration of natural gelatin and mild, sweet fat that melts at a lower temperature than beef tallow. This combination gives the meatloaf a softer, more delicate bite and prevents the beef from tasting overly heavy. If pork is not available or desired, 100% 80/20 ground beef chuck performs exceptionally well on its own.
The Chemistry of the Panade: The Moisture Insurance Policy
If fat provides flavor and lubricity, the panade provides structural moisture retention.
A panade is a culinary term for a paste made of starch (such as breadcrumbs, panko, or torn fresh bread) soaked in a liquid (typically whole milk, cream, or stock). In ground meat cookery, a panade is not merely a "filler" used to stretch the meat; it is a critical functional element that controls moisture on a microscopic level.
How a Panade Works
When ground meat is exposed to heat inside an oven, the muscle proteins—primarily myosin and actin—begin to denature at around 140°F (60°C). As they denature, the protein fibers contract like tightening ropes, squeezing out the water held within their cellular structures.If there is nothing in the meatloaf to capture this expelled liquid, the water drains out onto the baking sheet, leaving the meat fibers dry and compacted.
When you incorporate a panade:
- The starch granules in the breadcrumbs absorb the milk and swell.
- During baking, as the meat fibers contract and expel their juices, the gelatinized starch matrix of the panade acts like a cellular sponge, capturing and trapping the escaping water and rendered fats directly inside the loaf.
- The soft starch particles physically intersperse between the strands of ground meat, preventing the protein fibers from knitting together too tightly.
Panko vs. Traditional Breadcrumbs
Japanese panko breadcrumbs are made from crustless white bread that is baked using an electric current, creating airy, sliver-shaped flakes.Panko absorbs milk more readily than dense, commercially pulverized breadcrumbs, forming a lighter, more tender panade that does not make the meatloaf heavy or gummy. If panko is unavailable, fresh soft white sandwich bread with the crusts removed and pulsed into coarse crumbs in a food processor is an outstanding alternative.
The Danger of Overmixing: Myosin Development
Understanding how to physically handle ground meat is just as crucial as selecting the right ingredients.
Muscle tissue contains a long, filamentous protein called myosin. In whole cuts of meat, myosin provides structural integrity to muscle fibers. However, once meat is ground, the mechanical grinding process ruptures cell membranes, exposing free myosin molecules.
When you vigorously stir, knead, or squeeze ground meat with your hands, the mechanical friction activates these free myosin proteins. The molecules uncoil and cross-link with one another, forming an interlocking, rubbery web.
In sausage-making, myosin development is deliberately encouraged to give bratwurst and hot dogs their firm, snappy, bouncy bite. In meatloaf, however, aggressive mixing is disastrous; it transforms what should be a tender, delicate loaf into a dense, rubbery block that resembles a giant hot dog.
The Gentle Two-Bowl Mixing Method
To prevent overworking the meat:- Combine the Liquid Base First: In a large bowl, whisk together the eggs, panade, sautéed aromatics, tomato paste, Worcestershire sauce, mustard, and seasonings until completely homogenous. This ensures that salt and spices are evenly distributed throughout a liquid slurry.
- Fold Gently: Add the ground meat to the seasoned slurry. Using clean hands with fingers splayed like a rake, or a large fork, gently lift and fold the meat until the slurry is just incorporated. Do not squeeze the meat through your fingers, and do not knead it like bread dough. Stop the moment there are no large pockets of plain meat visible.
Why You Must Sauté Your Aromatics
A frequent error in amateur meatloaf recipes is adding raw, chopped onions and garlic directly into the raw meat mixture.
Raw onions are composed of roughly 89% water. When raw onion pieces are baked inside a dense loaf of meat, two problems arise:
- Excess Steam Pockets: As the oven heats the loaf, the raw onions expel their internal water. This creates steam pockets that leave large voids and fissures in the interior of the loaf, causing it to crack and crumble when sliced.
- Uncooked Texture and Pungency: An hour of baking inside an insulated meatloaf does not provide enough direct heat to properly cook raw onion pieces. The onion remains crunchy and sharp, interrupting the smooth, savory texture of the meat.
Baking Vessel: Sheet Pan vs. Loaf Pan
For decades, home cooks pressed their meatloaf mixture tightly into a standard metal 9x5-inch loaf pan. While convenient for shaping, baking meatloaf inside a deep loaf pan is fundamentally flawed.
When a meatloaf bakes inside a confined loaf pan:
- Trapped Grease: The rendered fat and expelled liquids have nowhere to go. The meatloaf ends up boiling in a pool of gray, rendered grease, leaving the bottom and sides soggy, pale, and unappealing.
- Restricted Airflow: The high metal walls of the loaf pan prevent dry oven heat from circulating around the sides of the meatloaf. Only the top surface can brown, eliminating the opportunity to build a rich, roasted exterior crust.
The Free-Form Sheet Pan Method
Instead of a loaf pan, shape the meat mixture by hand into a neat, uniform loaf directly on a parchment-lined, rimmed baking sheet:- A rimmed baking sheet allows excess fat to drain naturally away from the meat as it bakes.
- Hot oven air circulates around all four sides of the loaf, ensuring even heat penetration and creating a firm, caramelized exterior crust.
- The entire surface area—top, sides, and ends—can be coated in glaze, delivering sweet, sticky sauce in every single slice.
The Two-Stage Glazing Technique
The hallmark of traditional American meatloaf is its glossy, mahogany-red glaze made from ketchup, dark brown sugar, apple cider vinegar, Worcestershire sauce, and spices.
The glaze relies on sugar caramelization to create a sticky lacquer. However, if you apply the entire glaze at the very start of a 60-minute bake, the high sugar content in the ketchup and brown sugar will scorch and turn bitter before the center of the meatloaf reaches its target temperature.
Staging for Maximum Caramelization
- The Initial Bake (40 Minutes): Bake the meatloaf completely unglazed for the first 40 minutes at 350°F (175°C). This allows the outer crust to brown and set, rendering out initial surface moisture.
- The First Glaze (10 Minutes): Brush half of the glaze generously over the warm meatloaf. Return it to the oven for 10 minutes. The heat reduces the glaze, allowing the sugar and tomato paste to bubble and concentrate.
- The Final Glaze (10 to 15 Minutes): Brush the remaining glaze over the first layer. The final bake cooks the glaze into a thick, shiny, candy-like coating that clings tightly to the meat without running off or burning.
Essential Equipment
- Rimmed Half-Sheet Baking Pan: Heavy-gauge aluminum provides even heat distribution, while the 1-inch raised rim ensures rendered fat cannot spill onto the oven floor.
- Parchment Paper or Heavy Foil: Lining your baking sheet prevents the meatloaf from sticking and makes cleanup effortless.
- Small Skillet: For gently sautéing the minced onions and garlic in butter.
- Large Mixing Bowl: Provides ample space to fold the meat gently without compacting it against the sides.
- Silicone Pastry Brush: Ideal for painting the thick brown sugar glaze evenly over the top and sides of the loaf without tearing the meat crust.
- Digital Instant-Read Thermometer: The only reliable way to know when meatloaf is cooked to safety without slicing it open in the oven and losing precious juices.
- Serrated Slicing Knife: A long serrated bread knife or carving knife slices through the tender meatloaf and caramelized glaze cleanly without tearing or crumbling the loaf.
Step-by-Step Culinary Masterclass
Follow these numbered steps for a tender, perfectly glazed Classic Homemade Meatloaf.
Step 1: Oven Setup and Pan Preparation
Position an oven rack in the middle of your oven and preheat to 350°F (175°C / gas mark 4). Line a heavy rimmed half-sheet baking pan with parchment paper or heavy-duty aluminum foil lightly misted with nonstick cooking spray.Step 2: Make the Panade
In a small bowl, combine 1 cup of panko breadcrumbs and 1/2 cup of whole milk.Stir gently with a spoon to ensure all the breadcrumbs are moistened. Allow the mixture to sit undisturbed on the counter for 5 to 10 minutes. The breadcrumbs will absorb the liquid completely, transforming into a thick, uniform paste.
Step 3: Sauté the Aromatics
Melt 1 tablespoon of unsalted butter in a small skillet over medium heat.Add 1 finely minced yellow onion along with 1/4 teaspoon of fine kosher salt. Sauté, stirring frequently with a spatula, for 5 to 6 minutes until the onion is soft, translucent, and sweet, taking care not to brown it heavily.
Add 3 cloves of finely minced garlic. Cook, stirring constantly, for 45 to 60 seconds until fragrant. Remove the pan from the heat and let the mixture cool for 5 minutes until lukewarm.
Step 4: Whisk the Liquid Seasoning Slurry
In a large mixing bowl, beat 2 large room-temperature eggs with a fork.Add 2 tablespoons of tomato paste, 2 tablespoons of Worcestershire sauce, 1 tablespoon of smooth Dijon mustard, 1 1/2 teaspoons of fine kosher salt, 3/4 teaspoon of freshly cracked black pepper, 1 teaspoon of dried Italian herbs, and 1/4 cup of finely chopped fresh flat-leaf parsley. Whisk thoroughly until smooth.
Add the cooled sautéed onion and garlic mixture and the soaked breadcrumb panade to the bowl. Whisk everything together until you have a thick, fragrant, uniform seasoning paste.
Step 5: Incorporate the Ground Meat
Add 2 pounds of 80/20 ground beef chuck (or 1.5 pounds beef chuck and 0.5 pound ground pork) into the bowl with the seasoning slurry.Using clean hands with fingers splayed open, or a large fork, gently fold the ground meat into the mixture. Lift from the bottom of the bowl and turn, gently distributing the slurry throughout the meat.
Do not squeeze or knead the meat. Mix for only 45 to 60 seconds, stopping the moment the seasoning slurry is evenly distributed and no pockets of plain meat remain.
Step 6: Shape the Free-Form Loaf
Transfer the meat mixture directly onto the center of the prepared parchment-lined baking sheet.Using your hands, shape the mixture into a neat, rectangular loaf approximately 9 inches long, 5 inches wide, and 2 1/2 inches tall.
Lightly moisten your fingers with cold water and smooth the exterior of the loaf, closing any large surface cracks or crevices. A smooth surface prevents the meatloaf from splitting during baking and provides an even surface for the glaze.
Step 7: Mix the Glaze
In a small bowl, whisk together 1/2 cup of ketchup, 3 tablespoons of packed dark brown sugar, 1 1/2 tablespoons of apple cider vinegar, 1 teaspoon of Worcestershire sauce, 1/4 teaspoon of garlic powder, and an optional pinch of cayenne pepper until the brown sugar is fully dissolved. Set aside.Step 8: Initial Bake (Unglazed)
Place the baking sheet into the center of the preheated 350°F (175°C) oven.Bake unglazed for 40 minutes. During this stage, the interior starches set, the meat proteins gently coagulate, and the exterior develops a firm, lightly browned crust.
Step 9: Apply the First Glaze Layer
Carefully remove the baking sheet from the oven and set it on a heat-safe surface.Using a silicone pastry brush, apply half of the glaze mixture evenly over the top, sides, and ends of the warm meatloaf. Return the baking sheet to the oven and bake for 10 minutes. The glaze will begin to bubble, darken, and adhere to the meat crust.
Step 10: Apply the Final Glaze Layer and Finish Baking
Remove the baking sheet from the oven a second time. Brush the remaining half of the glaze over the top surface.Return the meatloaf to the oven for a final 10 to 15 minutes.
The meatloaf is finished when the glaze is glossy, caramelized at the bottom edges, and an instant-read digital thermometer inserted horizontally into the very center of the thickest portion registers 160°F (71°C).
Step 11: The Critical 15-Minute Rest
Transfer the baking sheet to a cooling rack or stovetop. Do not slice the meatloaf immediately.Allow the meatloaf to rest completely undisturbed for 15 full minutes.
During this rest, the boiling-hot internal juices settle and redistribute evenly throughout the protein-panade matrix. The exterior structure firms up slightly, ensuring that when you slice the loaf, each piece remains completely intact rather than crumbling apart.
Step 12: Slice and Serve
Using a long, sharp chef's knife or serrated knife, cut the meatloaf crosswise into 3/4-inch thick slices.Use a wide metal spatula to transfer the warm slices to dinner plates. Serve with creamy mashed potatoes, buttered green peas, or roasted carrots.
Troubleshooting Common Meatloaf Mistakes
The Loaf Crumbled Apart When Sliced
- The Cause: Slicing the meatloaf immediately without resting, omitting the egg binder, or using un-soaked dry breadcrumbs.
- The Solution: Always make a panade with milk and breadcrumbs, include 2 beaten eggs, and let the finished loaf rest undisturbed on the counter for 15 minutes before carving with a sharp serrated knife.
The Meatloaf is Dry and Chewy
- The Cause: Using ground beef leaner than 85/15, overmixing the meat, or overcooking the internal temperature past 165°F (74°C).
- The Solution: Use 80/20 ground chuck. Mix with a light hand just until combined. Use a digital thermometer to pull the meatloaf the moment the center reaches 160°F.
The Meatloaf is Soggy and Greasy
- The Cause: Baking the meatloaf inside a loaf pan where rendered fat cannot drain, or using meat with excessive fat (such as 70/30).
- The Solution: Always shape and bake free-form on a parchment-lined rimmed sheet pan so rendered fat drains away from the meat.
The Glaze Burned Black
- The Cause: Applying the sugar-heavy glaze at the very beginning of the 60-minute bake.
- The Solution: Follow the two-stage glazing method: bake unglazed for 40 minutes, brush the first glaze layer for 10 minutes, and apply the final layer for the last 10 minutes.
Variations and Dietary Customizations
Storage, Leftovers, and the Iconic Cold Sandwich
Meatloaf is famous for producing exceptional leftovers, as the flavors meld and deepen overnight in the refrigerator.
Refrigerator Storage
Allow leftover meatloaf to cool completely for no longer than 1 hour. Wrap the remaining loaf tightly in aluminum foil or store individual slices in an airtight glass container in the refrigerator at 38°F (3°C) or colder for up to 4 days.Freezing Guidelines
- Freezing Cooked Meatloaf: Wrap individual cooled slices in plastic wrap, then wrap in a layer of heavy aluminum foil. Place the wrapped slices in a freezer zip-top bag and freeze for up to 3 months. Thaw overnight in the refrigerator before reheating.
- Freezing Unbaked Meatloaf: Shape the raw meatloaf on a parchment-lined cardboard base. Freeze solid for 3 hours, then wrap tightly in two layers of plastic wrap and one layer of foil. Freeze for up to 3 months. Thaw completely in the refrigerator for 24 hours before baking as directed.
Reheating Instructions
- Skillet Method (Crispy Edges): Melt 1 teaspoon of butter in a nonstick skillet over medium heat. Place a slice of meatloaf in the pan and sear for 2 to 3 minutes per side until heated through and lightly crisped on the cut faces.
- Oven Method: Place slices in a baking dish, splash with 1 tablespoon of beef broth, cover with foil, and warm at 325°F (165°C) for 12 to 15 minutes.
- Microwave Method: Place a slice on a microwave-safe plate, cover with a damp paper towel, and reheat on 50% power for 90 seconds.
The Classic Cold Meatloaf Sandwich
Thick slices of cold leftover meatloaf make one of the finest sandwiches in American diner culture:- Take two thick slices of sourdough, country white, or potato bread.
- Toast the bread lightly and spread mayonnaise and yellow or Dijon mustard across both slices.
- Place a thick slice of cold meatloaf between the bread.
- Add crisp iceberg lettuce, thinly sliced bread-and-butter pickles, and a slice of sharp cheddar cheese.
Nutritional Breakdown and Macros
Classic homemade meatloaf provides high-quality complete protein, essential minerals, and balanced fats that provide long-lasting satiety.
| Nutrient | Amount per Serving (1/6 Loaf) | Daily Value (%) |
|---|---|---|
| Calories | 410 kcal | 21% |
| Protein | 28 g | 56% |
| Total Fat | 22 g | 28% |
| Saturated Fat | 9 g | 45% |
| Carbohydrates | 24 g | 9% |
| Dietary Fiber | 1 g | 4% |
| Sugars | 13 g | - |
| Sodium | 760 mg | 33% |
| Cholesterol | 135 mg | 45% |
| Potassium | 490 mg | 10% |
| Calcium | 75 mg | 6% |
| Iron | 3.6 mg | 20% |
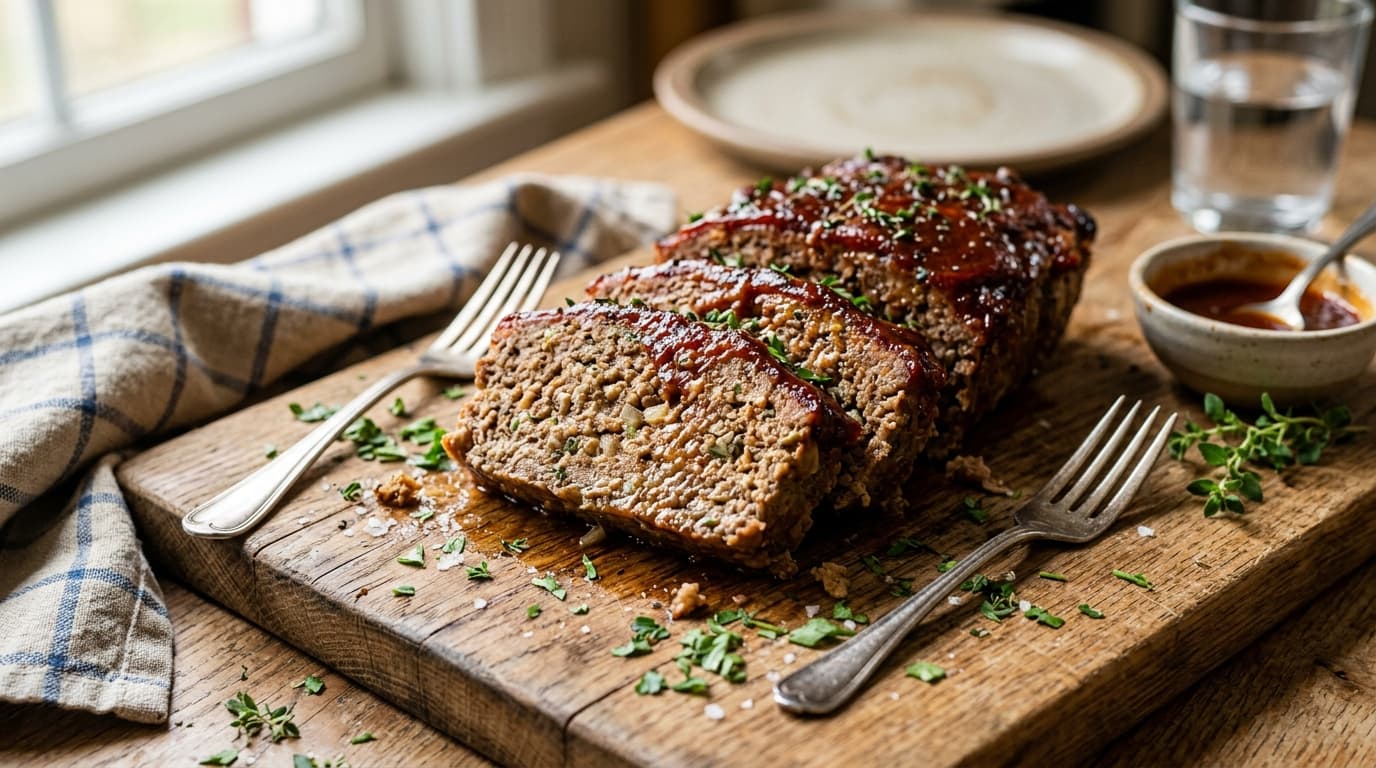
Classic Homemade Meatloaf with Sweet Tangy Glaze
Tender, juicy homemade meatloaf made with an 80/20 ground beef chuck blend, a milk-soaked panko panade, sweet sautéed onions, and a glossy, caramelized brown sugar and ketchup glaze.
Macro Nutrition Profile (Per Serving)
Ingredients
Tangy Sweet Glaze
Ingredient Substitutions
| Original Ingredient | Healthy Alternative |
|---|---|
| Animal protein | Firm tofu, tempeh, or organic chickpeas |
| Cooking fat | Extra virgin olive oil or grass-fed butter |
Instructions
Oven Setup and Pan Preparation: Position an oven rack in the middle of your oven and preheat to 350°F (175°C / gas mark 4). Line a heavy rimmed half-sheet baking pan with parchment paper or heavy-duty aluminum foil lightly misted with nonstick cooking spray.
Make the Panade: In a small bowl, combine 1 cup of panko breadcrumbs and 1/2 cup of whole milk. Stir gently with a spoon to ensure all the breadcrumbs are moistened. Allow the mixture to sit undisturbed on the counter for 5 to 10 minutes. The breadcrumbs will absorb the liquid completely, transforming into a thick, uniform paste.
Sauté the Aromatics: Melt 1 tablespoon of unsalted butter in a small skillet over medium heat. Add 1 finely minced yellow onion along with 1/4 teaspoon of fine kosher salt. Sauté, stirring frequently with a spatula, for 5 to 6 minutes until the onion is soft, translucent, and sweet, taking care not to brown it heavily. Add 3 cloves of finely minced garlic. Cook, stirring constantly, for 45 to 60 seconds until fragrant. Remove the pan from the heat and let the mixture cool for 5 minutes until lukewarm.
Whisk the Liquid Seasoning Slurry: In a large mixing bowl, beat 2 large room-temperature eggs with a fork. Add 2 tablespoons of tomato paste, 2 tablespoons of Worcestershire sauce, 1 tablespoon of smooth Dijon mustard, 1 1/2 teaspoons of fine kosher salt, 3/4 teaspoon of freshly cracked black pepper, 1 teaspoon of dried Italian herbs, and 1/4 cup of finely chopped fresh flat-leaf parsley. Whisk thoroughly until smooth. Add the cooled sautéed onion and garlic mixture and the soaked breadcrumb panade to the bowl. Whisk everything together until you have a thick, fragrant, uniform seasoning paste.
Incorporate the Ground Meat: Add 2 pounds of 80/20 ground beef chuck (or 1.5 pounds beef chuck and 0.5 pound ground pork) into the bowl with the seasoning slurry. Using clean hands with fingers splayed open, or a large fork, gently fold the ground meat into the mixture. Lift from the bottom of the bowl and turn, gently distributing the slurry throughout the meat. Do not squeeze or knead the meat. Mix for only 45 to 60 seconds, stopping the moment the seasoning slurry is evenly distributed and no pockets of plain meat remain.
Shape the Free-Form Loaf: Transfer the meat mixture directly onto the center of the prepared parchment-lined baking sheet. Using your hands, shape the mixture into a neat, rectangular loaf approximately 9 inches long, 5 inches wide, and 2 1/2 inches tall. Lightly moisten your fingers with cold water and smooth the exterior of the loaf, closing any large surface cracks or crevices. A smooth surface prevents the meatloaf from splitting during baking and provides an even surface for the glaze.
Mix the Glaze: In a small bowl, whisk together 1/2 cup of ketchup, 3 tablespoons of packed dark brown sugar, 1 1/2 tablespoons of apple cider vinegar, 1 teaspoon of Worcestershire sauce, 1/4 teaspoon of garlic powder, and an optional pinch of cayenne pepper until the brown sugar is fully dissolved. Set aside.
Initial Bake (Unglazed): Place the baking sheet into the center of the preheated 350°F (175°C) oven. Bake unglazed for 40 minutes. During this stage, the interior starches set, the meat proteins gently coagulate, and the exterior develops a firm, lightly browned crust.
Apply the First Glaze Layer: Carefully remove the baking sheet from the oven and set it on a heat-safe surface. Using a silicone pastry brush, apply half of the glaze mixture evenly over the top, sides, and ends of the warm meatloaf. Return the baking sheet to the oven and bake for 10 minutes. The glaze will begin to bubble, darken, and adhere to the meat crust.
Apply the Final Glaze Layer and Finish Baking: Remove the baking sheet from the oven a second time. Brush the remaining half of the glaze over the top surface. Return the meatloaf to the oven for a final 10 to 15 minutes. The meatloaf is finished when the glaze is glossy, caramelized at the bottom edges, and an instant-read digital thermometer inserted horizontally into the very center of the thickest portion registers 160°F (71°C).
The Critical 15-Minute Rest: Transfer the baking sheet to a cooling rack or stovetop. Do not slice the meatloaf immediately. Allow the meatloaf to rest completely undisturbed for 15 full minutes. During this rest, the boiling-hot internal juices settle and redistribute evenly throughout the protein-panade matrix. The exterior structure firms up slightly, ensuring that when you slice the loaf, each piece remains completely intact rather than crumbling apart.
Slice and Serve: Using a long, sharp chef's knife or serrated knife, cut the meatloaf crosswise into 3/4-inch thick slices. Use a wide metal spatula to transfer the warm slices to dinner plates. Serve with creamy mashed potatoes, buttered green peas, or roasted carrots.
Tried this recipe?
Let us know how it turned out! Click a star below to leave a review and rate the recipe.
Storage & Freezing Tips
- Refrigerator: Store in an airtight container for up to 2 days. Keep the components separate if possible to preserve texture.
- Reheating: Reheat gently in a skillet on medium-low heat with a splash of olive oil or butter.
- Freezing: Freezing is not recommended for this dish because ingredients like eggs become soggy, rubbery, or mushy when defrosted.
Frequently Asked Questions
Can this recipe be prepared ahead of time?▼
Yes, this meal is excellent for weekly meal prep. Store components separately and assemble before serving.
Is this recipe gluten-free?▼
All ingredients used are naturally gluten-free. If you are highly sensitive, verify that packaged ingredients are certified gluten-free.
Tried this recipe?
Tag @stewartlucas on Instagram and hashtag it #nutriguide!
You Might Also Like

Stewart Lucas
Nutritionist & Recipe DeveloperStewart Lucas is a nutritionist and recipe developer representing the NutriGuide team. All recipes, nutritional values, and diet protocols published on this site are designed and audited by certified dietitians and clinical nutrition professionals to guarantee absolute accuracy.
Community Reviews
Please log in to leave a review.