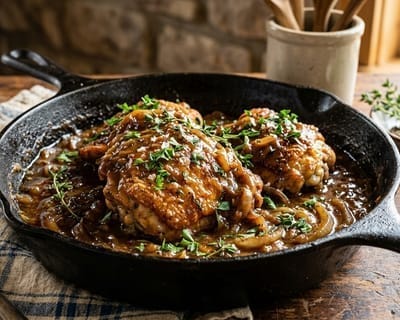
Southern Smothered Chicken with Onion Gravy
Crisp, seasoned pan-fried chicken thighs and drumsticks simmered low and slow in a rich, velvety brown pan gravy loaded with sweet caramelized onions and fresh garlic, served over white rice or mashed potatoes.
Key Takeaways
- ✓Ready in just 50 mins using straightforward, kitchen-tested technique.
- ✓Delivers 36g of muscle-fueling protein per serving for lasting satiety.
- ✓Portion-balanced at 520 calories per serving with wholesome, unrefined ingredients.
- ✓Masterclass temperature checkpoints ensure maximum tenderness and flavor development.
The Story
Southern Smothered Chicken represents the essence of American soul food and down-home country cooking. Few meals offer the comforting appeal of bone-in chicken pieces dredged in seasoned flour, pan-fried in cast iron until golden and crisp, and then simmered low and slow in a velvety brown pan gravy loaded with sweet caramelized onions and garlic.
While the name implies simplicity, achieving the deep, savory complexity of authentic Southern smothered chicken requires understanding the balance of seasoned dredging, fat management, roux coloration, and gentle stovetop braising.
When executed correctly, the chicken emerges fork-tender and succulent, sliding off the bone, while the rich, onion-laced pan gravy delivers savory depth over a bed of hot buttered rice or creamy mashed potatoes.
The Cultural Roots of Smothered Meat
The technique of "smothering" (étouffée in French and Louisiana Creole terminology) is one of the foundational cooking methods of the American South. Its history is tied to African American foodways, agricultural sharecropping, and the domestic kitchens of the rural South from the Carolinas down through the Mississippi Delta and the Gulf Coast.
In lowcountry and soul food culinary history, home cooks were frequently tasked with preparing tough, older barnyard hens (spent laying hens or stewing roosters) and inexpensive cuts of pork and beef. Because these meats were fibrous and lean, they could not be quickly roasted or fried without becoming tough.
Cooks developed the smothering method as a practical solution:
- Meat was dredged in seasoned wheat flour or cornstarch and fried in a small amount of rendered lard, bacon grease, or vegetable oil to establish color and a crisp exterior crust.
- In the same cast-iron skillet, abundant native sweet onions, bell peppers, and garlic were sautéed in the remaining pan drippings.
- The pan was deglazed with water, broth, or milk to create a rich gravy from the browned pan drippings (fond) and leftover dredge flour.
- The fried meat was returned to the skillet, buried underneath the seasoned gravy and onions, and covered with a tight lid to simmer gently for hours over the dying embers of a wood stove.
The Anatomy of the Cut: Why Bone-In Dark Meat is Non-Negotiable
The success of smothered chicken hinges upon selecting the correct cut of poultry.
You must use bone-in, skin-on chicken thighs and drumsticks.
Collagen and Gelatin Conversion
Dark poultry meat contains a high concentration of connective tissue, primarily collagen, surrounding the muscle fibers and joints. As chicken thighs simmer in the covered onion gravy between 165°F and 185°F (74°C to 85°C), this tough, fibrous collagen denatures and undergoes hydrolysis, slowly breaking down into liquid gelatin.This gelatin leaches into the braising gravy, giving the sauce a rich, lip-smacking viscosity and body that flour alone cannot replicate. Furthermore, the gelatin coats the meat fibers, ensuring the chicken remains juicy, tender, and succulent even after a 45-minute simmer.
The Problem with Chicken Breasts
Chicken breasts are composed of lean, white muscle tissue (pectoralis major) with almost no collagen and very little intramuscular fat. If you simmer a chicken breast inside a hot gravy for 40 minutes, the muscle proteins contract tightly, expelling all intracellular water. The breast meat turns dry, chalky, and stringy, absorbing very little flavor from the sauce. Save chicken breasts for quick pan-searing or stir-fries; smothered chicken belongs strictly to thighs, drumsticks, and wings.The Two-Step Seasoning and Dredging Technique
A common flaw in amateur smothered chicken recipes is relying solely on seasoned flour for flavor. When chicken is only seasoned on the flour coating, the meat underneath remains bland and under-salted.
Authentic Southern technique employs a two-step seasoning method:
Step 1: Seasoning the Bare Meat Directly
Pat the raw chicken thighs and drumsticks dry with paper towels. Season the bare poultry generously with a blend of kosher salt, black pepper, garlic powder, onion powder, and smoked paprika.Allow the seasoned chicken to sit at room temperature for 15 to 20 minutes before dredging. The salt dissolves in the surface moisture of the meat, creating a concentrated brine that penetrates through the skin into the muscle tissue via osmosis.
Step 2: Seasoning the Dredge Flour
Whisk all-purpose flour in a wide, shallow bowl with additional salt, black pepper, garlic powder, and a pinch of cayenne pepper.Dredging the seasoned chicken in flour accomplishes two vital physical goals:
- When fried in the hot skillet, the flour starch absorbs hot oil and forms a crisp, golden-brown crust via the Maillard reaction.
- When the chicken is later smothered in gravy, the browned flour crust acts like a sponge, drinking in the savory onion broth and holding the gravy against the meat.
Mastering the Pan-Fry in Cast Iron
A heavy, seasoned cast-iron skillet is the undisputed tool for Southern smothered chicken. Cast iron possesses high thermal mass; when cold pieces of dredged chicken are placed into the hot oil, the thick iron base maintains its searing heat, preventing the oil temperature from dropping precipitously.
Oil Temperature and Depth
Pour roughly 1/3 cup of neutral high-heat oil (such as peanut oil, canola oil, or vegetable shortening) into the skillet. You are not deep-frying the chicken; you are shallow pan-frying. The oil should come roughly 1/4 inch up the sides of the chicken pieces.Heat the oil over medium-high heat until it shimmers and reaches approximately 350°F (175°C).
Fry the dredged chicken pieces in batches for 5 to 6 minutes per side. Do not attempt to cook the chicken through to the bone during this stage; the goal is solely to develop a deep, golden-brown, crunchy exterior crust. Transfer the par-cooked chicken to a wire rack or clean plate and set aside.
The Science of the Onion Pan Gravy
The soul of smothered chicken resides in its onion pan gravy. The gravy is built directly in the same skillet using the rendered poultry fat, browned pan drippings (fond), sweet alliums, and stock.
Step 1: Managing the Skillet Fat
After removing the fried chicken, examine the oil in your skillet. You will have a mixture of cooking oil, rendered chicken fat, and loose browned flour bits.Pour off excess oil until you have approximately 3 to 4 tablespoons of fat remaining in the pan. This fat contains concentrated roasted poultry flavor that forms the lipid foundation of your roux.
Step 2: Sautéing and Caramelizing the Onions
Melt 2 tablespoons of unsalted butter into the remaining pan fat over medium heat.Add 2 large thinly sliced yellow onions along with a pinch of kosher salt. As the onions heat up, they release water vapor.
Using a flat-edged wooden spoon, aggressively scrape the bottom of the cast iron skillet. The moisture from the softening onions dissolves the caramelized chicken fond, lifting the rich brown residue into the cooking fat.
Cook the onions, stirring frequently, for 8 to 10 minutes until they soften, shrink, and turn a rich, golden amber color. Caramelizing the onions breaks down their complex starches into sweet, simple fructose and glucose, providing a gentle sweetness that balances the savory, salty chicken broth.
Step 3: The Pan Roux
Once the onions are soft and golden, sprinkle 3 tablespoons of the leftover seasoned dredge flour directly over the onions and fat.Stir continuously for 2 full minutes over medium heat. The flour coats the onions, absorbs the fat, and cooks out its raw, pasty starch flavor, transforming into a fragrant, nutty, pale-tan roux.
Step 4: Deglazing and Hydration
Slowly pour in 3 cups of low-sodium chicken broth in a thin, steady stream while whisking or stirring constantly.Bringing the liquid to a rolling simmer causes the starch granules in the flour to swell and rupture (gelatinization), rapidly transforming the thin broth into a glossy, velvety brown gravy.
The Smother: Gentle Stovetop Braising
Once the gravy is bubbling, nestle the fried chicken pieces back into the skillet, spooning generous amounts of the hot onion gravy over the top of each piece until the chicken is completely "smothered."
Heat Control and Simmering
Turn the burner down to its lowest setting (low or simmer).Cover the skillet tightly with a heavy lid or tight foil. Allow the dish to braise gently for 35 to 40 minutes.
During this covered simmer:
- The chicken finishes cooking gently through to the bone.
- The tough collagen surrounding the thigh bones melts into liquid gelatin, enriching the gravy.
- The internal meat temperature reaches an optimal 175°F to 185°F (79°C to 85°C), where dark poultry meat is at its peak tenderness.
- The savory onion broth permeates every fiber of the chicken, yielding meat that pulls apart with the touch of a fork.
Essential Equipment
- 12-Inch Seasoned Cast-Iron Skillet with Lid: The quintessential vessel for Southern frying and braising. If your cast-iron skillet does not have a matching iron lid, a heavy stainless steel lid or a tight double layer of heavy-duty aluminum foil works effectively.
- Flat-Edged Wooden Spatula: Indispensable for scraping the browned fond off the cast-iron surface during onion caramelization.
- Metal Tongs: For flipping chicken pieces in hot oil without puncturing the skin and releasing internal juices.
- Wire Cooling Rack set inside a Baking Sheet: Holds the fried chicken pieces while you build the onion gravy, preventing the bottom crust from turning soggy.
- Instant-Read Digital Thermometer: Ensures the chicken reaches 175°F to 185°F for maximum collagen breakdown and tenderness.
Step-by-Step Instructions
Step 1: Season the Raw Chicken
Pat 3 pounds of bone-in, skin-on chicken thighs and drumsticks completely dry with paper towels.In a small bowl, combine 1 1/2 teaspoons of fine kosher salt, 1/2 teaspoon of freshly cracked black pepper, 1 teaspoon of garlic powder, 1 teaspoon of onion powder, 1 teaspoon of smoked paprika, and 1/4 teaspoon of ground cayenne pepper.
Sprinkle the seasoning blend evenly all over the chicken pieces, using your hands to rub the spices under the skin and across all sides. Let the seasoned chicken sit on the counter at room temperature for 15 minutes.
Step 2: Prepare the Seasoned Flour Dredge
In a wide, shallow bowl or pie dish, add 1 cup of all-purpose flour.Add the remaining 1/2 teaspoon of kosher salt, 1/2 teaspoon of black pepper, 1/2 teaspoon of garlic powder, 1/2 teaspoon of onion powder, and 1/2 teaspoon of poultry seasoning (or dried thyme). Whisk thoroughly with a fork until the spices are evenly distributed.
Dredge each seasoned chicken piece in the flour, turning to coat completely. Shake off any excess flour so only a light, even dusting clings to the skin. Place the dredged chicken on a clean tray. Reserve 3 tablespoons of the leftover flour for the gravy.
Step 3: Pan-Fry the Chicken
Pour 1/3 cup of high-heat cooking oil (such as peanut or vegetable oil) into a 12-inch cast-iron skillet. Place over medium-high heat until the oil shimmers and registers roughly 350°F (175°C).Carefully lay half of the chicken pieces into the hot oil skin-side down.
Fry undisturbed for 5 to 6 minutes until the skin is deep golden brown and crisp. Use tongs to flip each piece and fry for another 4 to 5 minutes on the second side.
Transfer the browned chicken to a wire rack set over a baking sheet. Repeat with the remaining chicken pieces. The chicken will not be cooked through to the bone at this stage.
Step 4: Sauté and Caramelize the Onions
Carefully pour off the excess oil from the skillet into a heat-safe bowl, leaving approximately 3 tablespoons of rendered fat and browned drippings in the pan.Reduce the skillet heat to medium. Add 2 tablespoons of unsalted butter to the pan.
Add 2 large sliced yellow onions along with a pinch of salt.
Cook the onions, stirring frequently with a flat-edged wooden spoon, for 8 to 10 minutes. As the onions soften and release moisture, scrape the bottom of the skillet firmly to lift all the rich, caramelized chicken fond into the fat. The onions will soften, collapse, and turn a sweet, golden-amber color.
Add 4 cloves of finely minced garlic and cook, stirring constantly, for 60 seconds until fragrant.
Step 5: Build the Pan Roux
Sprinkle 3 tablespoons of the reserved seasoned dredge flour directly over the softened onions in the skillet.Stir continuously for 2 full minutes over medium heat. The flour will absorb the fat and coat the onions, cooking out raw starch flavor and developing a nutty, pale-tan aroma.
Step 6: Whisk the Gravy
Slowly pour in 3 cups of low-sodium chicken broth in a thin, steady stream while stirring continuously with your wooden spoon.Stir in 1 tablespoon of Worcestershire sauce and add 2 sprigs of fresh thyme.
Bring the liquid to a gentle boil over medium heat, stirring constantly to ensure the flour dissolves smoothly. As the gravy bubbles, it will thicken into a rich, glossy brown sauce that generously coats the back of a spoon. Taste the gravy and adjust with a small pinch of kosher salt or black pepper if needed.
Step 7: Smother and Braise the Chicken
Nestle the browned chicken thighs and drumsticks, along with any savory juices that pooled on the tray, back into the skillet.Using a large spoon, ladle the hot onion gravy all over the chicken pieces until they are completely submerged and smothered in sauce.
Turn the burner down to its lowest heat setting (low or simmer).
Cover the skillet tightly with its lid or a tight double layer of heavy aluminum foil.
Allow the chicken to simmer gently on low heat for 35 to 40 minutes. Do not boil vigorously; the liquid should maintain a slow, gentle bubble.
Step 8: Final Finish and Rest
Remove the lid. The chicken will be fork-tender and succulent, with an internal temperature registering between 175°F and 185°F (79°C to 85°C).If you desire an ultra-silky, rich gravy, stir 1/2 cup of heavy cream or whole milk gently into the sauce around the chicken pieces and let it warm through for 2 minutes.
Turn off the heat and discard the thyme stems. Let the skillet rest uncovered on the stove for 5 to 10 minutes before serving. During this rest, the gravy thickens slightly, and the chicken fibers relax, locking in moisture.
Step 9: Plate and Serve
Ladle a generous mound of warm, fluffy white rice or creamy mashed potatoes into wide shallow bowls.Using tongs, place a smothered chicken thigh and drumstick over the starch.
Spoon abundant amounts of the rich onion pan gravy and caramelized onions over the top. Garnish with finely chopped fresh flat-leaf parsley. Serve immediately with warm buttermilk biscuits or skillet cornbread.
Common Mistakes and How to Avoid Them
The Gravy is Pale, Thin, and Watery
- The Cause: Not cooking the flour roux long enough, or using water instead of rich chicken broth.
- The Solution: Ensure you scrape up all the browned fond when sautéing the onions. Cook the flour with the onions for 2 full minutes until pale tan, and use high-quality chicken bone broth for maximum body and flavor.
The Gravy is Starch-Lumpy
- The Cause: Dumping cold broth all at once into the hot flour and onions without stirring.
- The Solution: Slowly pour in the broth in a steady stream while whisking or stirring continuously with a wooden spoon until the roux dissolves completely into the liquid.
The Chicken Meat is Dry and Tough
- The Cause: Using skinless chicken breasts instead of bone-in dark meat, or boiling the chicken vigorously over high heat rather than gently simmering on low.
- The Solution: Use bone-in, skin-on thighs and drumsticks. Keep the burner on its lowest simmer setting so the collagen breaks down gently over 35 to 40 minutes without seizing the muscle proteins.
Variations and Regional Twists
Storage, Reheating, and Make-Ahead Science
Smothered chicken is famous for tasting even better the next day, as the chicken continues to absorb the savory onion gravy as it cools.
Refrigerator Storage
Allow leftover smothered chicken and gravy to cool completely at room temperature for no longer than 1 hour. Transfer to an airtight glass container and store in the refrigerator at 38°F (3°C) or colder for up to 4 days.Freezing Guidelines
Smothered chicken freezes exceptionally well:- Place the cooled chicken pieces and gravy into freezer-safe containers or heavy zip-top freezer bags, ensuring the meat is fully submerged in gravy to prevent freezer burn.
- Freeze for up to 3 months. Thaw overnight in the refrigerator before reheating.
Reheating Instructions
- Stovetop Method (Best): Place the chicken and gravy into a skillet or saucepan over medium-low heat. Add 2 to 3 tablespoons of water or chicken broth if the gravy has thickened into a gel. Cover with a lid and warm gently for 8 to 10 minutes, turning the chicken occasionally until steaming hot (165°F / 74°C).
- Microwave Method: Place a chicken piece and generous gravy in a microwave-safe bowl. Cover with a paper towel and heat on 70% power for 2 to 3 minutes, stirring the gravy halfway through.
Nutritional Breakdown and Macros
Southern Smothered Chicken provides high-density animal protein, bioavailable minerals, and nourishing dietary fats.
| Nutrient | Amount per Serving (1 Thigh + Drumstick with Gravy) | Daily Value (%) |
|---|---|---|
| Calories | 520 kcal | 26% |
| Protein | 36 g | 72% |
| Total Fat | 32 g | 41% |
| Saturated Fat | 10 g | 50% |
| Carbohydrates | 22 g | 8% |
| Dietary Fiber | 2 g | 7% |
| Sugars | 5 g | - |
| Sodium | 860 mg | 37% |
| Cholesterol | 165 mg | 55% |
| Potassium | 540 mg | 11% |
| Calcium | 65 mg | 5% |
| Iron | 3.2 mg | 18% |
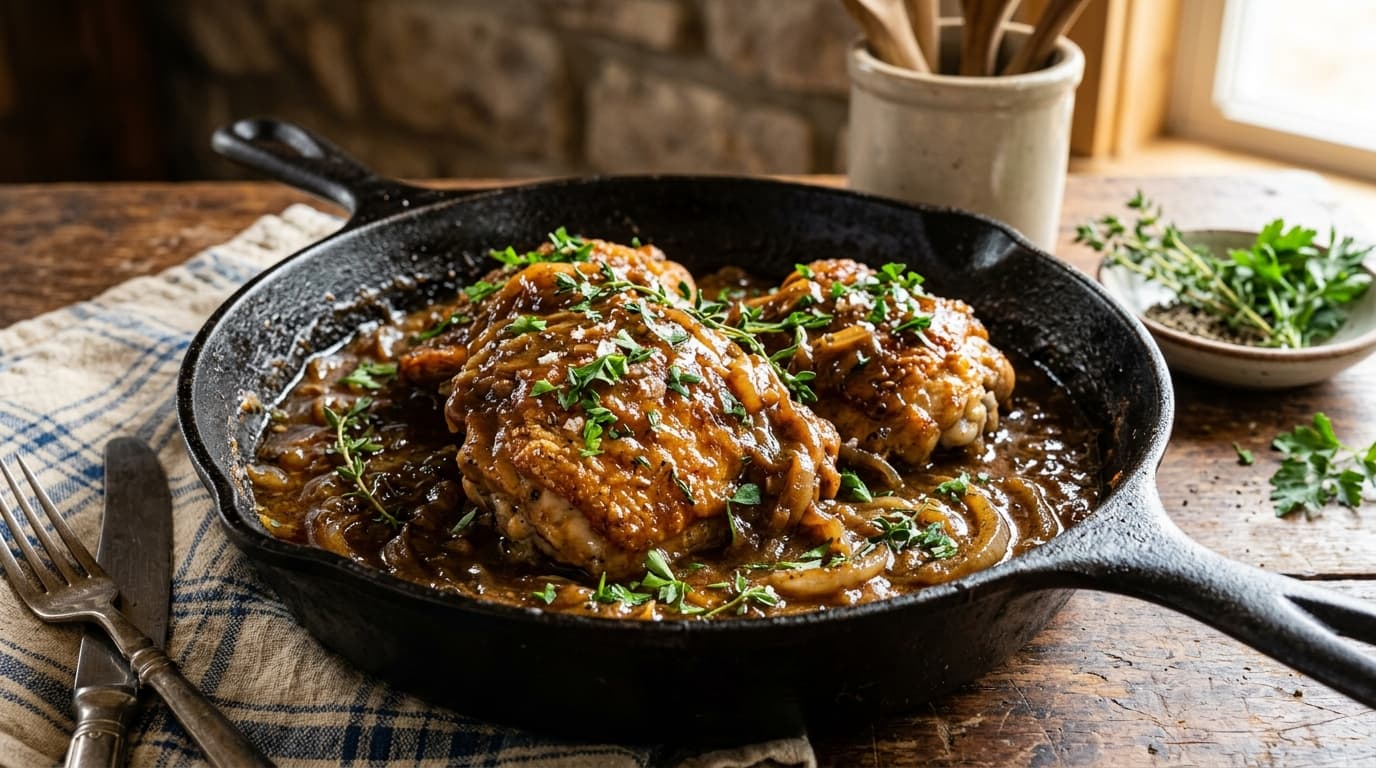
Southern Smothered Chicken with Onion Gravy
Crisp, seasoned pan-fried chicken thighs and drumsticks simmered low and slow in a rich, velvety brown pan gravy loaded with sweet caramelized onions and fresh garlic, served over white rice or mashed potatoes.
Macro Nutrition Profile (Per Serving)
Ingredients
Ingredient Substitutions
| Original Ingredient | Healthy Alternative |
|---|---|
| Chicken breast | Turkey breast or extra-firm tofu (1:1 ratio) |
| Dino kale/greens | Baby spinach or Swiss chard (cooks faster, add at the end) |
Instructions
Season the Raw Chicken: Pat 3 pounds of bone-in, skin-on chicken thighs and drumsticks completely dry with paper towels. In a small bowl, combine 1 1/2 teaspoons of fine kosher salt, 1/2 teaspoon of freshly cracked black pepper, 1 teaspoon of garlic powder, 1 teaspoon of onion powder, 1 teaspoon of smoked paprika, and 1/4 teaspoon of ground cayenne pepper. Sprinkle the seasoning blend evenly all over the chicken pieces, using your hands to rub the spices under the skin and across all sides. Let the seasoned chicken sit on the counter at room temperature for 15 minutes.
Prepare the Seasoned Flour Dredge: In a wide, shallow bowl or pie dish, add 1 cup of all-purpose flour. Add the remaining 1/2 teaspoon of kosher salt, 1/2 teaspoon of black pepper, 1/2 teaspoon of garlic powder, 1/2 teaspoon of onion powder, and 1/2 teaspoon of poultry seasoning (or dried thyme). Whisk thoroughly with a fork until the spices are evenly distributed. Dredge each seasoned chicken piece in the flour, turning to coat completely. Shake off any excess flour so only a light, even dusting clings to the skin. Place the dredged chicken on a clean tray. Reserve 3 tablespoons of the leftover flour for the gravy.
Pan-Fry the Chicken: Pour 1/3 cup of high-heat cooking oil (such as peanut or vegetable oil) into a 12-inch cast-iron skillet. Place over medium-high heat until the oil shimmers and registers roughly 350°F (175°C). Carefully lay half of the chicken pieces into the hot oil skin-side down. Fry undisturbed for 5 to 6 minutes until the skin is deep golden brown and crisp. Use tongs to flip each piece and fry for another 4 to 5 minutes on the second side. Transfer the browned chicken to a wire rack set over a baking sheet. Repeat with the remaining chicken pieces. The chicken will not be cooked through to the bone at this stage.
Sauté and Caramelize the Onions: Carefully pour off the excess oil from the skillet into a heat-safe bowl, leaving approximately 3 tablespoons of rendered fat and browned drippings in the pan. Reduce the skillet heat to medium. Add 2 tablespoons of unsalted butter to the pan. Add 2 large sliced yellow onions along with a pinch of salt. Cook the onions, stirring frequently with a flat-edged wooden spoon, for 8 to 10 minutes. As the onions soften and release moisture, scrape the bottom of the skillet firmly to lift all the rich, caramelized chicken fond into the fat. The onions will soften, collapse, and turn a sweet, golden-amber color. Add 4 cloves of finely minced garlic and cook, stirring constantly, for 60 seconds until fragrant.
Build the Pan Roux: Sprinkle 3 tablespoons of the reserved seasoned dredge flour directly over the softened onions in the skillet. Stir continuously for 2 full minutes over medium heat. The flour will absorb the fat and coat the onions, cooking out raw starch flavor and developing a nutty, pale-tan aroma.
Whisk the Gravy: Slowly pour in 3 cups of low-sodium chicken broth in a thin, steady stream while stirring continuously with your wooden spoon. Stir in 1 tablespoon of Worcestershire sauce and add 2 sprigs of fresh thyme. Bring the liquid to a gentle boil over medium heat, stirring constantly to ensure the flour dissolves smoothly. As the gravy bubbles, it will thicken into a rich, glossy brown sauce that generously coats the back of a spoon. Taste the gravy and adjust with a small pinch of kosher salt or black pepper if needed.
Smother and Braise the Chicken: Nestle the browned chicken thighs and drumsticks, along with any savory juices that pooled on the tray, back into the skillet. Using a large spoon, ladle the hot onion gravy all over the chicken pieces until they are completely submerged and smothered in sauce. Turn the burner down to its lowest heat setting (low or simmer). Cover the skillet tightly with its lid or a tight double layer of heavy aluminum foil. Allow the chicken to simmer gently on low heat for 35 to 40 minutes. Do not boil vigorously; the liquid should maintain a slow, gentle bubble.
Final Finish and Rest: Remove the lid. The chicken will be fork-tender and succulent, with an internal temperature registering between 175°F and 185°F (79°C to 85°C). If you desire an ultra-silky, rich gravy, stir 1/2 cup of heavy cream or whole milk gently into the sauce around the chicken pieces and let it warm through for 2 minutes. Turn off the heat and discard the thyme stems. Let the skillet rest uncovered on the stove for 5 to 10 minutes before serving. During this rest, the gravy thickens slightly, and the chicken fibers relax, locking in moisture.
Plate and Serve: Ladle a generous mound of warm, fluffy white rice or creamy mashed potatoes into wide shallow bowls. Using tongs, place a smothered chicken thigh and drumstick over the starch. Spoon abundant amounts of the rich onion pan gravy and caramelized onions over the top. Garnish with finely chopped fresh flat-leaf parsley. Serve immediately with warm buttermilk biscuits or skillet cornbread.
Tried this recipe?
Let us know how it turned out! Click a star below to leave a review and rate the recipe.
Storage & Freezing Tips
- Refrigerator: Store leftovers in an airtight container for up to 3-4 days.
- Reheating: Heat in a saucepan or skillet on medium heat until hot throughout.
- Freezing: Freeze portions in airtight containers for up to 2 months. Reheat directly from frozen or after thawing.
Frequently Asked Questions
Can this recipe be prepared ahead of time?▼
Yes, this meal is excellent for weekly meal prep. Store components separately and assemble before serving.
Is this recipe gluten-free?▼
All ingredients used are naturally gluten-free. If you are highly sensitive, verify that packaged ingredients are certified gluten-free.
Tried this recipe?
Tag @stewartlucas on Instagram and hashtag it #nutriguide!
You Might Also Like

Stewart Lucas
Nutritionist & Recipe DeveloperStewart Lucas is a nutritionist and recipe developer representing the NutriGuide team. All recipes, nutritional values, and diet protocols published on this site are designed and audited by certified dietitians and clinical nutrition professionals to guarantee absolute accuracy.
Community Reviews
Please log in to leave a review.