
Classic Denver Omelet with Ham, Peppers, and Cheddar
A classic American diner omelet folded with diced smoked ham, crisp sautéed green bell peppers, sweet yellow onions, and melted sharp cheddar cheese.
Key Takeaways
- ✓Ready in just 10 mins using straightforward, kitchen-tested technique.
- ✓Delivers 32g of muscle-fueling protein per serving for lasting satiety.
- ✓Portion-balanced at 490 calories per serving with wholesome, unrefined ingredients.
- ✓Masterclass temperature checkpoints ensure maximum tenderness and flavor development.
The Story
The Denver omelet, frequently called the Western omelet across American diners, holds a permanent place on breakfast menus from Colorado mining towns to East Coast lunch counters. Its combination of diced smoked ham, crisp green bell peppers, sweet yellow onions, and melted sharp cheddar cheese balances savory, salty, sweet, and tangy elements in every bite.
While diner cooks can turn out a Denver omelet in under three minutes on a greased flat-top grill, making one at home often results in common kitchen mistakes: rubbery, browned egg sheets, a watery puddle under the folded omelet, or cold cheese that refuses to melt around crunchy raw vegetables. Understanding how egg proteins behave under heat and how to prep the filling beforehand makes the difference between an average breakfast and a tender, restaurant-quality omelet.
Historical Origins of the Western and Denver Omelet
The history of the Denver omelet is rooted in nineteenth-century American frontier life, cattle drives, and transcontinental railroad expansion across the Rocky Mountains.
Food historians generally trace the dish to Chinese cooks working in railroad camps and mining settlements throughout Colorado, Utah, and California in the 1850s to 1870s. These cooks drew inspiration from egg foo young, whisking eggs with whatever ingredients were readily available in rough frontier supply depots: cured ham that resisted spoilage, hardy yellow storage onions, and fresh or pickled peppers. The mixture was cooked quickly in smoking cast-iron pans over wood-fired stoves.
Because miners and railroad laborers needed portable meals they could eat with their hands during long shifts, cooks began serving these flat egg-and-ham patties pressed between two thick slices of sourdough or toasted bread. This sandwich became known across the Rocky Mountain region as the Western Sandwich or the Denver Sandwich.
As frontier settlements evolved into permanent cities and railroad dining cars introduced formal sit-down meal services, urban diners replaced the bread slices with breakfast toast on the side. Cooks folded the egg over the filling and added shredded American or cheddar cheese, officially giving birth to the folded Denver omelet. Today, whether a menu calls it a Denver omelet or a Western omelet, the core combination of ham, bell peppers, onions, and cheddar remains a bedrock of American comfort food.
The Food Science of Egg Coagulation
Cooking eggs is a lesson in protein chemistry. An egg is composed primarily of water (about 75%) and protein (about 12%), along with emulsified lipids in the yolk. In raw eggs, these proteins resemble tightly coiled balls of yarn floating in water.
When heat is applied, energy transfers into the liquid mixture, causing the protein molecules to vibrate, uncoil, and bump into neighboring proteins. This process is called denaturation. As the proteins uncoil, their exposed chemical bonds link together to form a three-dimensional mesh network that traps water inside. This transformation from liquid to solid is known as coagulation.
Temperature Thresholds for Whole Eggs
Egg whites and egg yolks coagulate at distinct temperatures:
- Egg white proteins begin coagulating at approximately 144°F (62°C) and set firmly by 149°F (65°C).
- Egg yolk proteins start setting at 149°F (65°C) and become firm at 158°F (70°C).
- When thoroughly whisked together, a whole beaten egg mixture coagulates uniformly between 150°F and 156°F (65°C to 69°C).
The Role of Added Water vs. Milk
A common question among home cooks is whether to whisk milk, cream, or water into their eggs.
Water is the superior choice for a classic folded omelet. Adding approximately 1 tablespoon of cold water per 3 large eggs lightens the texture. As the eggs cook in the buttered skillet, the water heats quickly and converts into tiny bubbles of steam. These steam pockets expand within the setting protein network, aerating the curds and creating a fluffy, tender lift without adding density.
Milk or heavy cream, on the other hand, contains dairy fats, proteins (casein and whey), and natural sugars (lactose). While milk is suitable for rich French-style scrambled eggs cooked slowly over low heat, in an omelet skillet it causes two distinct problems:
- Lactose caramelizes rapidly at moderate cooking temperatures, browning the bottom of the omelet before the top has set.
- The dairy solids dilute the egg proteins without providing steam, resulting in a heavier, flabbier egg sheet that tears easily when folded.
Ingredient Selection and Ratios
The Denver omelet relies on straightforward ingredients, making the quality and preparation of each component critical.
The Eggs
Use fresh Grade AA or Grade A large eggs. Fresh eggs have thick, gelatinous whites that hold their structure and maintain a vibrant, rich yolk. If your eggs have been in the refrigerator for several weeks, the whites thin out and become watery.Bring your eggs to room temperature 15 minutes before cooking, or place them in a bowl of lukewarm tap water for 5 minutes. Cold eggs straight from a 38°F refrigerator cause an immediate temperature drop when poured into the warm buttered pan, forcing you to cook them longer and increasing the risk of tough, browned edges.
The Ham
Smoked, cooked city ham or leftover holiday ham works best. Look for ham with a firm texture and low moisture content. Avoid pre-packaged, water-added sandwich lunchmeat slices, which are injected with sodium phosphates and excess water; they weep liquid into the pan and lack the firm chew of genuine diced ham.Dice the ham into uniform 1/4-inch cubes. If the pieces are cut too large, they puncture the delicate egg sheet during folding; if cut too small, their salty, savory bite gets lost in the eggs.
The Green Bell Pepper
The green bell pepper provides herbal bitterness, crisp crunch, and color contrast against the pale yellow eggs and pink ham. Choose firm peppers with taut, unblemished skin.Seed the pepper and slice away the white inner ribs, which contain bitter pith. Cut the pepper into neat 1/4-inch dice matching the size of the ham. Green bell pepper is traditional, but red or orange bell peppers can be substituted if you prefer a sweeter flavor profile.
The Onion
A firm yellow onion provides balanced allium sweetness when sautéed. White onions offer a sharper bite, while sweet onions (such as Vidalia or Walla Walla) can turn overly soft and watery during cooking.Dice the onion finely (1/4-inch). The goal is for the onion pieces to soften and lightly sweeten without taking on dark caramelization, which can overpower the clean egg flavor.
The Cheese
Sharp cheddar cheese is the traditional choice for a Denver omelet. Its acidity cuts through the richness of the egg yolk and the saltiness of the ham. Medium cheddar, Monterey Jack, pepper Jack, or American cheese can also be used depending on your taste preferences.Always grate the cheese directly from a block using the medium or large holes of a box grater. Avoid pre-shredded bagged cheese. Commercial pre-shredded cheeses are treated with powdered cellulose and potato starch to keep the shreds from sticking together in the bag. These additives prevent smooth melting, leaving behind a greasy, chalky film rather than a creamy, cohesive blanket of cheese.
Butter
Use pure unsalted butter. Butter adds flavor and lubricates the pan, while its milk solids serve as a visual temperature indicator. When the butter melts and stops foaming, the water has evaporated, signaling that the pan is at the correct temperature for the eggs. Using salted butter can make the omelet overly salty, especially in combination with cured ham and cheddar.Essential Equipment
You do not need specialized restaurant tools to make a great omelet, but using the correct pan and spatula makes the process seamless.
- 8-Inch Nonstick Skillet: An 8-inch skillet (measured across the top rim) is the gold standard for a 3-egg omelet. It provides roughly 50 square inches of surface area, which yields an egg sheet of ideal thickness: sturdy enough to fold without tearing, yet thin enough to cook through quickly without drying out. If you use a 10-inch or 12-inch skillet, the eggs spread out paper-thin and overcook into brittle sheets. Ensure the nonstick coating is smooth and free of deep scratches.
- Flexible Silicone Spatula: A thin, heat-resistant silicone spatula with rounded corners allows you to sweep around the curved edges of the skillet without scratching the nonstick surface. Avoid rigid nylon spatulas or metal utensils.
- Balloon Whisk or Fork: A standard balloon whisk or a clean table fork aerates the eggs and shears the albumen strings so the whites and yolks incorporate completely.
- Rimmed Plate or Skillet Lid: Having a lid or plate ready to cover the pan during the final 30 seconds traps ambient steam, ensuring the cheese melts thoroughly without keeping the burner on.
Step-by-Step Culinary Masterclass
Follow these numbered steps for a Denver omelet with tender curds, evenly distributed filling, and perfectly melted cheese.
Step 1: Prep the Ingredients
Dice 1/3 cup of cooked smoked ham, 1/4 cup of green bell pepper, and 1/4 cup of yellow onion into uniform 1/4-inch pieces. Grate 1/3 cup of sharp cheddar cheese from a block. Measure 1 1/2 tablespoons of unsalted butter, separating 1/2 tablespoon for the vegetables and 1 tablespoon for the eggs.Step 2: Sauté the Filling
Place your 8-inch nonstick skillet over medium heat and melt 1/2 tablespoon of unsalted butter. Once the butter foams, add the diced bell pepper and onion along with a small pinch of kosher salt (about 1/16 teaspoon).Sauté the vegetables, stirring frequently with your spatula, for 3 to 4 minutes. You want the peppers to turn bright green and tender-crisp, and the onions to become translucent. Sautéing expels their internal water so it will not weep into the eggs later.
Add the diced ham to the skillet and toss with the vegetables for 60 seconds just to take the refrigerator chill off and release its savory aroma. Transfer the warm filling to a small bowl or plate and set aside. Wipe the skillet clean with a folded dry paper towel.
Step 3: Whisk the Eggs
Crack 3 large room-temperature eggs into a medium mixing bowl. Add 1 tablespoon of cold water, 1/4 teaspoon of fine kosher salt, and 1/8 teaspoon of freshly ground black pepper.Whisk vigorously for 30 to 45 seconds. Lift the whisk or fork periodically to check for egg white strings. The mixture should be completely homogenous, pale yellow, and slightly frothy on top with no visible streaks of clear albumen. Complete blending ensures the omelet cooks evenly without rubbery white patches.
Step 4: Heat the Pan and Melt the Butter
Place the clean skillet back over medium-low heat. Add the remaining 1 tablespoon of unsalted butter. Swirl the pan so the butter coats the bottom and approximately 1/2 inch up the sides.Watch the butter closely: it will melt, foam, and then the foam will begin to subside. This occurs at approximately 260°F to 280°F (126°C to 138°C). Do not let the butter brown. Browning adds a nutty hazelnut flavor that is prized in French cooking, but a classic American diner omelet calls for sweet, clean butter flavor and a pristine yellow exterior.
Step 5: Pour and Form the Curds
Pour the beaten egg mixture directly into the center of the pan. It should sizzle very softly without splattering. Allow the eggs to sit completely undisturbed for 10 to 15 seconds so a thin foundation layer coagulates across the bottom of the pan.Take your silicone spatula and gently push the cooked edge of the egg toward the center of the skillet from four opposite directions (12 o'clock, 3 o'clock, 6 o'clock, and 9 o'clock). As you pull the cooked curds inward, tilt the skillet with your other hand so the raw, liquid egg running across the top flows into the empty spaces created on the pan surface.
Continue this gentle push-and-tilt motion for 45 to 60 seconds. You are creating soft, layered curds while allowing raw egg to cook against the warm pan. Stop moving the spatula when about 80% of the egg is set, leaving the surface glossy, moist, and custard-like. Residual heat will finish cooking this surface layer without drying it out.
Step 6: Add the Filling and Cheese
Using an offset spatula or clean hands, scatter the warm ham, bell pepper, and onion mixture evenly over one half of the egg round, leaving a 1/2-inch border along the outer edge.Evenly sprinkle the 1/3 cup of freshly grated sharp cheddar cheese directly on top of the warm filling. Placing the cheese over the hot vegetables helps it melt from both sides: heat from the sautéed vegetables below and ambient steam from above.
Step 7: Fold the Omelet
Turn the heat down to low. Slide your silicone spatula gently under the unfilled half of the omelet to ensure it is not sticking to the pan.In one smooth motion, lift the empty half of the egg sheet and fold it over the filled half, creating a neat half-moon crescent. Gently press down on the folded edge with the flat of the spatula to seal the seam.
Step 8: Steam to Melt the Cheese
Turn off the heat completely. Cover the skillet with a lid, a sheet of aluminum foil, or an inverted heat-safe plate for 30 to 45 seconds. The trapped residual steam melts the cheddar into a rich, gooey sauce that binds the ham, peppers, and onions together, all without subjecting the bottom of the omelet to direct burner heat that could cause scorching or browning.Step 9: Plate and Serve
Remove the lid. Tilt the skillet toward a warm serving plate and gently slide the omelet out, seam-side facing inward or slightly rolled. If desired, brush the top lightly with a tiny dab of softened butter for a diner-style sheen, and garnish with finely sliced fresh chives. Serve immediately while hot.Common Mistakes and Kitchen Troubleshooting
Even experienced cooks occasionally run into issues when cooking eggs. Here is how to diagnose and prevent common mistakes with a Denver omelet.
The Omelet Weeps Water on the Plate
- The Cause: Water on the plate is caused by two factors: syneresis (overcooking the eggs until the protein matrix squeezes out moisture) or adding raw vegetables that release steam after folding.
- The Fix: Always sauté the bell peppers and onions beforehand until their surface moisture evaporates. Remove the omelet from direct heat while the top surface is still glossy and slightly custardy; do not cook it until dry and matte.
The Egg Browned Heavily on the Bottom
- The Cause: The burner heat was set too high, milk or cream was added to the eggs, or the butter was allowed to brown before pouring the eggs.
- The Fix: Use medium-low heat. Eggs cook quickly, and gentle heat gives you control. Use cold water rather than dairy in your egg mixture, and pour the eggs into the skillet the moment the butter foam subsides.
The Omelet Tore or Split When Folded
- The Cause: Either the skillet was too small (making the egg too thick to bend cleanly), too much filling was piled into the center, or the filling was spread across the entire omelet rather than concentrated on one half.
- The Fix: Use an 8-inch skillet for 3 eggs. Limit your total filling volume to approximately 3/4 cup combined (vegetables, ham, and cheese). Keep all filling strictly on one half of the egg circle, leaving a clear border around the rim.
The Cheese Inside Did Not Melt
- The Cause: The cheese was cold straight from the refrigerator, pre-shredded cheese coated in anti-caking starches was used, or the omelet was plated immediately without a resting period.
- The Fix: Grate fresh cheddar from a block. Ensure your sautéed ham, pepper, and onion mixture is warm when added. Always cover the skillet off-heat for 30 to 45 seconds before plating to allow steam to melt the cheese.
Variations and Dietary Adjustments
Storage, Reheating, and Make-Ahead Tips
Omelets are best enjoyed fresh off the stove, but components can be prepared in advance for busy mornings, and leftovers can be stored safely.
Meal Prep and Advance Preparation
You can dice the ham, green bell peppers, and yellow onions up to 3 days in advance. Sauté the mixture completely, let it cool to room temperature, and store it in an airtight glass container in the refrigerator.When ready to cook breakfast, microwave the portion of filling for 15 to 20 seconds just to remove the chill before adding it to your eggs. You can also grate your cheddar cheese in advance and store it sealed in the refrigerator.
Storing Leftover Cooked Omelet
If you have leftover cooked omelet, let it cool completely at room temperature for no longer than 30 minutes. Place it in a shallow, airtight glass storage container lined with a sheet of paper towel to absorb any surface condensation. Store in the refrigerator for up to 2 days.Reheating Instructions
Never microwave an omelet on high power; rapid heating causes the egg proteins to seize, turning the omelet rubbery and squeezing out water.- Skillet Method (Recommended): Melt 1 teaspoon of butter in a nonstick skillet over low heat. Place the cold folded omelet in the pan, cover with a tight lid, and warm gently for 2 to 3 minutes until heated through and the cheese remelts.
- Low-Power Microwave Method: Place the omelet on a microwave-safe plate. Cover with a damp paper towel. Reheat at 50% power in 30-second bursts until warm to the touch.
Nutritional Breakdown and Macros
A classic 3-egg Denver omelet prepared with butter, diced smoked ham, vegetables, and sharp cheddar is a naturally low-carbohydrate, high-protein meal that provides sustained energy without blood sugar spikes.
| Nutrient | Amount per Serving | Daily Value (%) |
|---|---|---|
| Calories | 490 kcal | 25% |
| Protein | 32 g | 64% |
| Total Fat | 37 g | 47% |
| Saturated Fat | 18 g | 90% |
| Carbohydrates | 5 g | 2% |
| Dietary Fiber | 1 g | 4% |
| Sugars | 3 g | - |
| Sodium | 780 mg | 34% |
| Cholesterol | 590 mg | 197% |
| Potassium | 340 mg | 7% |
| Calcium | 280 mg | 28% |
| Iron | 2.8 mg | 16% |
Classic Denver Omelet with Ham, Peppers, and Cheddar
A classic American diner omelet folded with diced smoked ham, crisp sautéed green bell peppers, sweet yellow onions, and melted sharp cheddar cheese.

Macro Nutrition Profile (Per Serving)
Ingredients
Ingredient Substitutions
| Original Ingredient | Healthy Alternative |
|---|---|
| Animal protein | Firm tofu, tempeh, or organic chickpeas |
| Cooking fat | Extra virgin olive oil or grass-fed butter |
Instructions
Prep the Ingredients: Dice 1/3 cup of cooked smoked ham, 1/4 cup of green bell pepper, and 1/4 cup of yellow onion into uniform 1/4-inch pieces. Grate 1/3 cup of sharp cheddar cheese from a block. Measure 1 1/2 tablespoons of unsalted butter, separating 1/2 tablespoon for the vegetables and 1 tablespoon for the eggs.
Sauté the Filling: Place your 8-inch nonstick skillet over medium heat and melt 1/2 tablespoon of unsalted butter. Once the butter foams, add the diced bell pepper and onion along with a small pinch of kosher salt (about 1/16 teaspoon). Sauté the vegetables, stirring frequently with your spatula, for 3 to 4 minutes. You want the peppers to turn bright green and tender-crisp, and the onions to become translucent. Sautéing expels their internal water so it will not weep into the eggs later. Add the diced ham to the skillet and toss with the vegetables for 60 seconds just to take the refrigerator chill off and release its savory aroma. Transfer the warm filling to a small bowl or plate and set aside. Wipe the skillet clean with a folded dry paper towel.
Whisk the Eggs: Crack 3 large room-temperature eggs into a medium mixing bowl. Add 1 tablespoon of cold water, 1/4 teaspoon of fine kosher salt, and 1/8 teaspoon of freshly ground black pepper. Whisk vigorously for 30 to 45 seconds. Lift the whisk or fork periodically to check for egg white strings. The mixture should be completely homogenous, pale yellow, and slightly frothy on top with no visible streaks of clear albumen. Complete blending ensures the omelet cooks evenly without rubbery white patches.
Heat the Pan and Melt the Butter: Place the clean skillet back over medium-low heat. Add the remaining 1 tablespoon of unsalted butter. Swirl the pan so the butter coats the bottom and approximately 1/2 inch up the sides. Watch the butter closely: it will melt, foam, and then the foam will begin to subside. This occurs at approximately 260°F to 280°F (126°C to 138°C). Do not let the butter brown. Browning adds a nutty hazelnut flavor that is prized in French cooking, but a classic American diner omelet calls for sweet, clean butter flavor and a pristine yellow exterior.
Pour and Form the Curds: Pour the beaten egg mixture directly into the center of the pan. It should sizzle very softly without splattering. Allow the eggs to sit completely undisturbed for 10 to 15 seconds so a thin foundation layer coagulates across the bottom of the pan. Take your silicone spatula and gently push the cooked edge of the egg toward the center of the skillet from four opposite directions (12 o'clock, 3 o'clock, 6 o'clock, and 9 o'clock). As you pull the cooked curds inward, tilt the skillet with your other hand so the raw, liquid egg running across the top flows into the empty spaces created on the pan surface. Continue this gentle push-and-tilt motion for 45 to 60 seconds. You are creating soft, layered curds while allowing raw egg to cook against the warm pan. Stop moving the spatula when about 80% of the egg is set, leaving the surface glossy, moist, and custard-like. Residual heat will finish cooking this surface layer without drying it out.
Add the Filling and Cheese: Using an offset spatula or clean hands, scatter the warm ham, bell pepper, and onion mixture evenly over one half of the egg round, leaving a 1/2-inch border along the outer edge. Evenly sprinkle the 1/3 cup of freshly grated sharp cheddar cheese directly on top of the warm filling. Placing the cheese over the hot vegetables helps it melt from both sides: heat from the sautéed vegetables below and ambient steam from above.
Fold the Omelet: Turn the heat down to low. Slide your silicone spatula gently under the unfilled half of the omelet to ensure it is not sticking to the pan. In one smooth motion, lift the empty half of the egg sheet and fold it over the filled half, creating a neat half-moon crescent. Gently press down on the folded edge with the flat of the spatula to seal the seam.
Steam to Melt the Cheese: Turn off the heat completely. Cover the skillet with a lid, a sheet of aluminum foil, or an inverted heat-safe plate for 30 to 45 seconds. The trapped residual steam melts the cheddar into a rich, gooey sauce that binds the ham, peppers, and onions together, all without subjecting the bottom of the omelet to direct burner heat that could cause scorching or browning.
Plate and Serve: Remove the lid. Tilt the skillet toward a warm serving plate and gently slide the omelet out, seam-side facing inward or slightly rolled. If desired, brush the top lightly with a tiny dab of softened butter for a diner-style sheen, and garnish with finely sliced fresh chives. Serve immediately while hot.
Tried this recipe?
Let us know how it turned out! Click a star below to leave a review and rate the recipe.
Storage & Freezing Tips
- Refrigerator: Store in an airtight container for up to 2 days. Keep the components separate if possible to preserve texture.
- Reheating: Reheat gently in a skillet on medium-low heat with a splash of olive oil or butter.
- Freezing: Freezing is not recommended for this dish because ingredients like eggs become soggy, rubbery, or mushy when defrosted.
Frequently Asked Questions
Can this recipe be prepared ahead of time?▼
Yes, this meal is excellent for weekly meal prep. Store components separately and assemble before serving.
Is this recipe gluten-free?▼
All ingredients used are naturally gluten-free. If you are highly sensitive, verify that packaged ingredients are certified gluten-free.
Tried this recipe?
Tag @stewartlucas on Instagram and hashtag it #nutriguide!
You Might Also Like
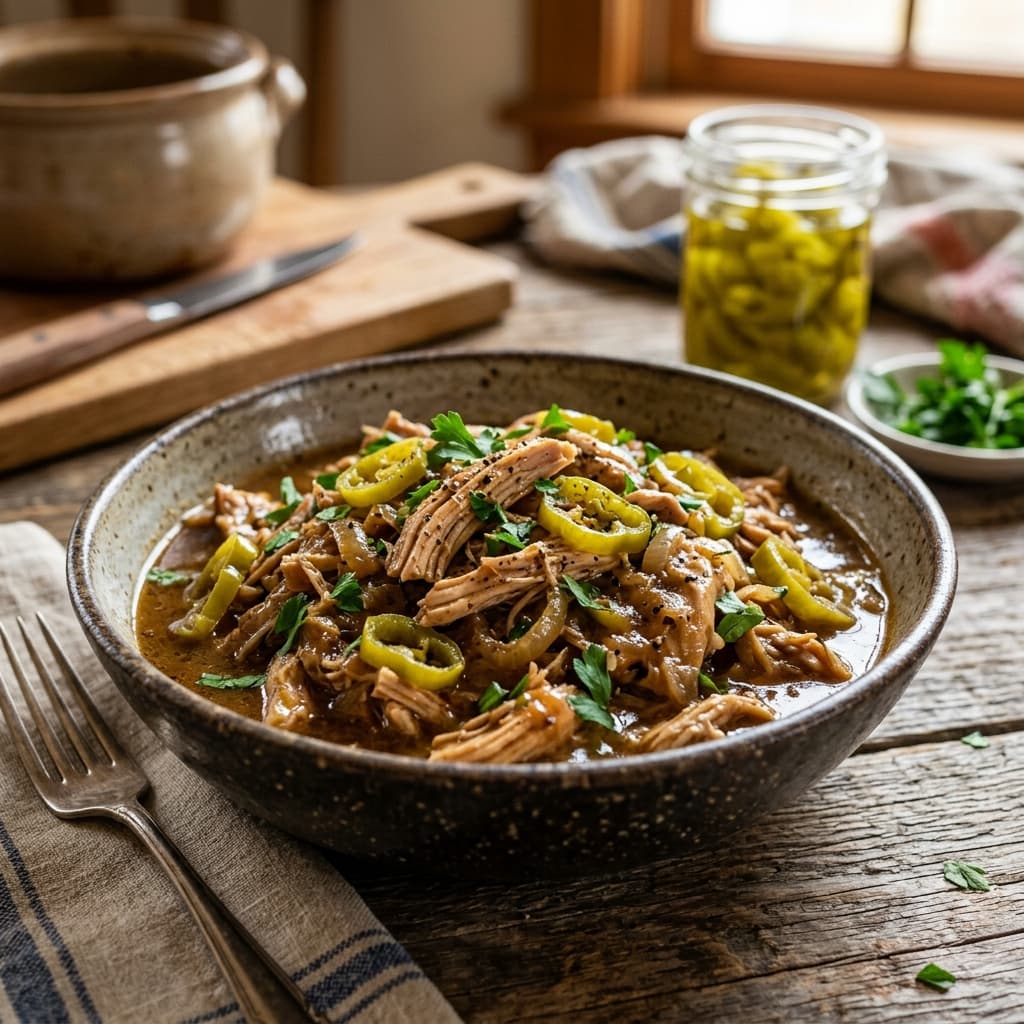
Slow Cooker Mississippi Chicken (Zesty Pepperoncini & Butter Braise Masterclass)


Stewart Lucas
Nutritionist & Recipe DeveloperStewart Lucas is a nutritionist and recipe developer representing the NutriGuide team. All recipes, nutritional values, and diet protocols published on this site are designed and audited by certified dietitians and clinical nutrition professionals to guarantee absolute accuracy.
Community Reviews
Please log in to leave a review.