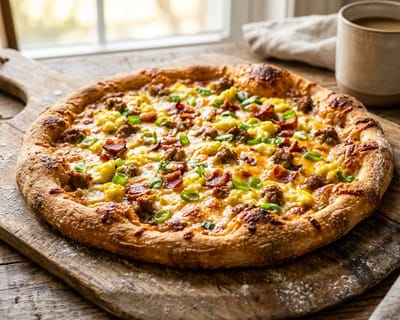
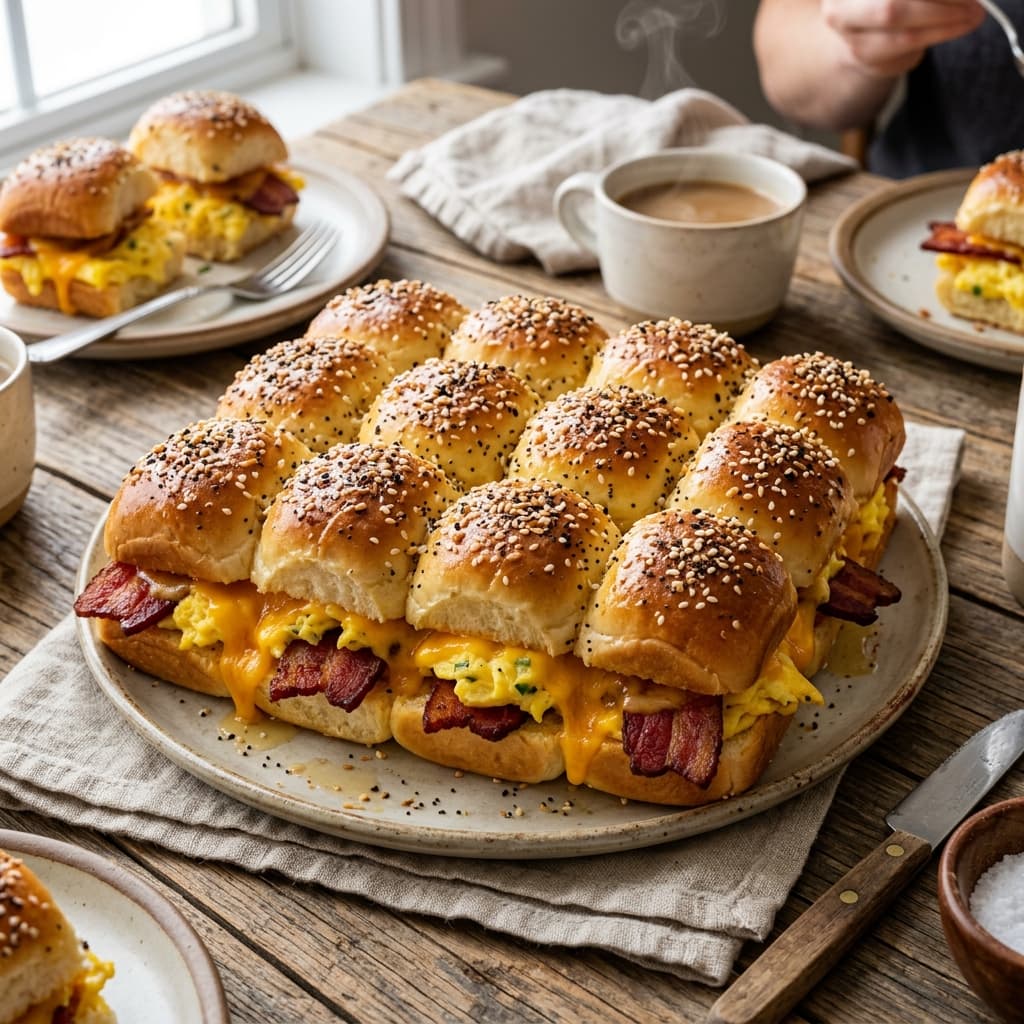
Sausage and Cheddar Breakfast Pizza
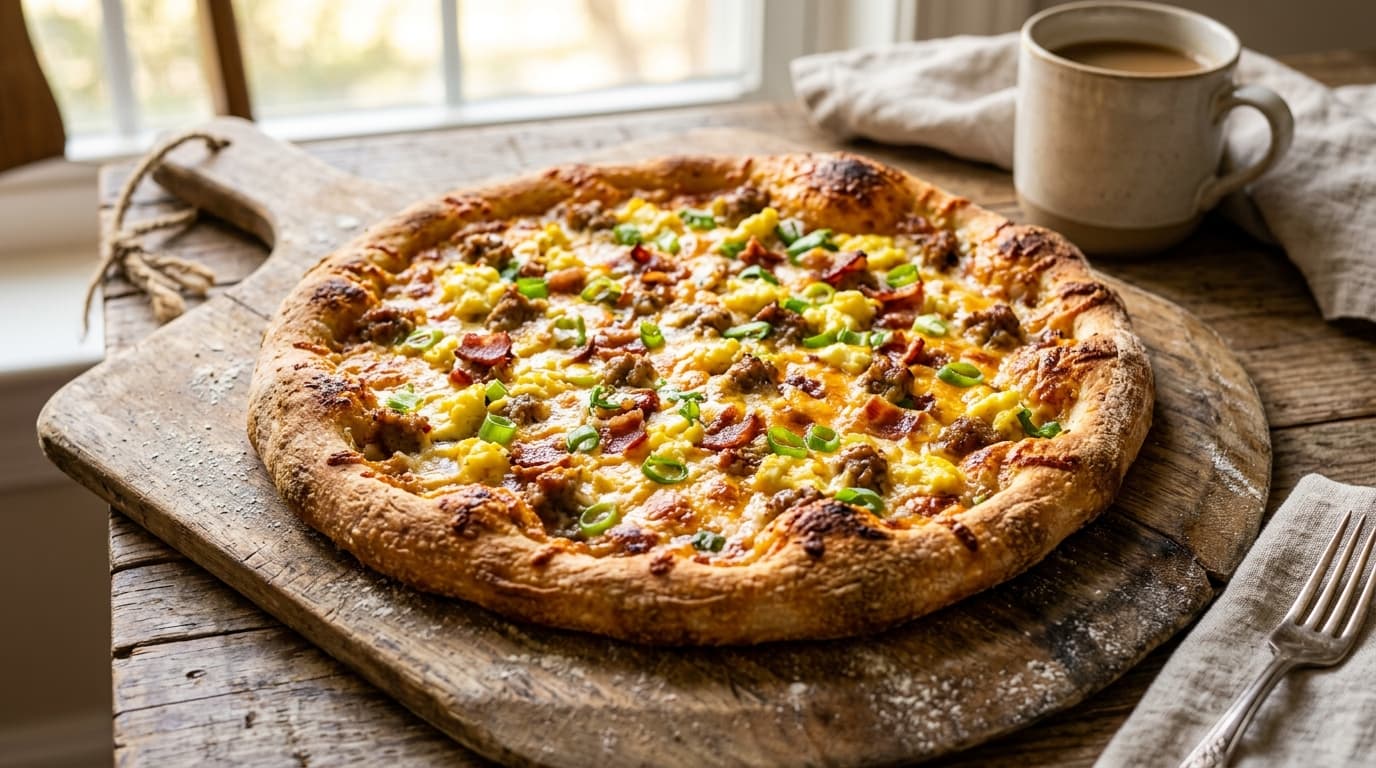
Crisp, golden homemade pizza crust layered with rich country sausage gravy, soft scrambled eggs, browned breakfast sausage crumbles, melted sharp cheddar, and crispy bacon.
Key Takeaways
- ✓Ready in just 20 mins using straightforward, kitchen-tested technique.
- ✓Delivers 21g of muscle-fueling protein per serving for lasting satiety.
- ✓Portion-balanced at 420 calories per serving with wholesome, unrefined ingredients.
- ✓Masterclass temperature checkpoints ensure maximum tenderness and flavor development.
The Story
Breakfast pizza has evolved from a regional convenience store novelty into an established weekend brunch centerpiece. A well-executed breakfast pizza combines all the essential components of a classic American country breakfast—crusty hearth-baked bread, savory pork sausage, rich black pepper milk gravy, soft scrambled eggs, and sharp melted cheese—into a single sliceable pie.
Despite its universal appeal, homemade breakfast pizza frequently falls victim to execution mistakes. The most common errors include a soggy, undercooked crust caused by moisture seeping from the gravy, eggs that turn dry and rubbery under high oven heat, or an oily, separated cheese layer.
By applying proper baking physics, par-baking the dough, under-scrambling the eggs on the stove, and balancing fat emulsions in the country gravy, you can produce a breakfast pizza with a shatteringly crisp bottom crust, velvety gravy, and tender, custard-soft curds.
The Origins and Regional Evolution of Breakfast Pizza
Pizza in the United States spent much of the twentieth century categorized strictly as an evening meal or late-night convenience food. However, in the rural American Midwest during the 1980s and 1990s, regional convenience store chains—most notably Casey's General Store in Iowa—began experimenting with breakfast items cooked on their commercial pizza ovens.
Casey's introduced a pizza featuring cheese sauce or sausage gravy as the base, topped with scrambled eggs, breakfast meats, and cheddar cheese. It was designed as an energy-dense, portable breakfast for farm workers, truck drivers, and early-morning commuters. The concept spread rapidly across Midwestern diners and Southern bakeries.
In subsequent decades, artisan pizzerias and brunch restaurants elevated the concept. By replacing canned cheese sauces with scratch-made country sausage gravy (sawmill gravy), utilizing naturally fermented artisan pizza dough, and incorporating aged sharp cheddar alongside whole-milk mozzarella, the breakfast pizza transitioned into a respected culinary dish that rivals classic breakfast casseroles, quiches, and frittatas.
Crust Physics: Preventing the Dreaded "Gum Line"
The structural foundation of any pizza is its crust. In standard pizza cookery, raw dough is topped with a thin layer of acidic tomato sauce and shredded mozzarella, then baked quickly at 500°F to 900°F (260°C to 480°C).
A breakfast pizza, however, presents a distinct thermodynamic challenge:
- The base sauce is country sausage gravy, a thick milk-and-flour emulsion with a high water content.
- The primary topping is scrambled eggs, which are roughly 75% water.
The result is a permanent culinary defect known as a gum line: a dense, gray, translucent layer of unbaked, pasty dough directly beneath the sauce that never cooks through, regardless of how long the pizza stays in the oven.
The Solution: The Par-Bake Technique
Par-baking (partially baking) the crust before adding toppings is non-negotiable for breakfast pizza.
- Stretch the room-temperature dough into a 12-to-14-inch round on a baking sheet or pizza peel dusted with cornmeal.
- Prick the interior dough surface all over with a fork (docking). Docking creates tiny vent holes that allow steam to escape, preventing the center of the dough from ballooning up into large air bubbles while the rim puffs naturally.
- Brush the surface lightly with olive oil to seal the microscopic surface pores.
- Bake the plain dough on a preheated pizza stone or heavy baking sheet at 475°F (245°C) for 5 to 6 minutes.
The Chemistry of Country Sausage Gravy
Country sausage gravy (often called sawmill gravy in Southern culinary tradition) is a bechamel variation built on pork sausage drippings.
A proper sausage gravy requires a precise balance of three elements:
- Rendered Animal Fat and Flour (The Roux): When bulk pork breakfast sausage is browned in a hot skillet, it renders roughly 2 tablespoons of clear lard and savory pan drippings. Adding 2 tablespoons of all-purpose flour directly to this rendered fat coats the flour starch granules in lipids. Cooking this mixture over medium heat for 2 minutes breaks down the raw wheat starch flavor while allowing the Maillard reaction to develop a nutty aroma.
- Warm Whole Milk: The milk must be warm or room temperature when added to the roux. Cold milk shocks the hot fat, causing the flour starches to clump into stubborn dough balls. Pouring warm whole milk in a slow, steady stream while whisking continuously ensures that the starch molecules hydrate evenly, swelling to create a smooth, velvety suspension.
- Coarse Black Pepper: Black pepper contains piperine, a pungent alkaloid compound that provides sharp, biting heat. In a heavy dairy gravy, piperine cuts directly through the coating richness of the butterfat and pork lard, waking up the palate and providing the signature flavor profile of Southern gravy.
Egg Cookery: The Principle of the Double Bake
Cooking scrambled eggs for a pizza requires counter-intuitive kitchen technique: you must deliberately undercook the eggs on the stove.
Egg proteins (ovalbumin and ovotransferrin) coagulate into tender curds between 144°F and 158°F (62°C to 70°C). When egg curds exceed 165°F (74°C), the protein fibers contract tightly, squeezing out their internal water in a process called syneresis.
If you fully scramble your eggs on the stovetop until dry and firm, and then place them on a pizza inside a 475°F oven for 8 minutes, the eggs will cook twice. By the time the pizza comes out, the eggs will be dry, rubbery, sulfurous, and will weep water onto the cheese.
The Stovetop Method for Pizza Eggs
- Whisk 6 eggs with 2 tablespoons of cold water, salt, and pepper. Water turns to steam in the pan, lightening the curd.
- Melt 1 tablespoon of butter in a nonstick skillet over medium-low heat.
- Pour in the eggs and cook slowly, using a silicone spatula to push the curds gently from the edges toward the center.
- Stop cooking when the eggs are roughly 70% set. The curds should be large, wet, glossy, and still slightly runny, resembling a soft custard.
- Immediately transfer the soft curds to a plate to halt the pan's residual heat.
Cheese Selection: The 60/40 Cheddar-Mozzarella Blend
While cheddar cheese provides the signature sharp flavor of a classic breakfast, using 100% cheddar cheese on a pizza is a mistake.
Sharp cheddar has an aged, broken-down protein structure with a high fat-to-protein ratio. When baked at temperatures exceeding 450°F, cheddar's protein matrix collapses completely, releasing its butterfat into a greasy, separated orange puddle that soaks the toppings without providing any cohesive stretch.
Low-moisture whole-milk mozzarella, by contrast, is a pasta filata (stretched curd) cheese with long, intact protein fibers. It melts smoothly, traps fat droplets within its matrix, and stretches into tender, elastic strands.
The Ideal Ratio
Blend 60% sharp yellow cheddar with 40% low-moisture whole-milk mozzarella:- The sharp cheddar provides acidity, rich allium compatibility, and deep orange color.
- The mozzarella provides structural elasticity, preventing oil separation and forming a cohesive blanket that locks the loose sausage crumbles and scrambled eggs onto the crust.
Essential Equipment
- Heavy Rimmed Baking Sheet or Baking Stone: A pizza stone or heavy steel baking plate preheated in the oven delivers maximum bottom heat transfer, blistered crust, and zero sogginess. Alternatively, an inverted heavy-gauge rimmed half-sheet baking pan provides an excellent baking surface.
- Pizza Peel or Rimless Cookie Sheet: For transferring the shaped dough smoothly into the hot oven. Dusting with fine yellow cornmeal acts like tiny ball bearings, allowing the dough to slide off effortlessly.
- 10-Inch Cast-Iron or Stainless Skillet: For browning the pork sausage and building the black pepper country gravy.
- 8-Inch Nonstick Skillet: For gently scrambling the eggs to a soft curd.
- Silicone Pastry Brush: For brushing olive oil onto the outer crust rim before baking.
- Rolling Pizza Wheel: For slicing through the thick layers of cheese, egg, and crust in single, clean cuts without dragging toppings.
Step-by-Step Instructions
Step 1: Proof and Prep the Dough
Remove 1 pound of pizza dough from the refrigerator at least 1 hour before baking. Keep it covered in an oiled bowl on the kitchen counter. Cold dough straight from the refrigerator contracts elastically and snaps back when stretched; bringing it to room temperature relaxes the gluten network, allowing you to stretch it thin without tearing.Step 2: Cook the Bacon and Brown the Sausage
Place 4 strips of thick-cut bacon in a large skillet over medium heat. Fry for 6 to 8 minutes, turning occasionally, until crisp and golden brown. Transfer the bacon to paper towels to drain, let cool, and chop into 1/2-inch pieces.In the same skillet (or a clean 10-inch skillet), add 8 ounces of bulk pork breakfast sausage over medium-high heat.
Using a wooden spoon, break the sausage into small, bite-sized crumbles as it cooks. Sauté for 5 to 6 minutes until the meat is thoroughly browned and caramelized at the edges with no pink remaining.
Using a slotted spoon, transfer approximately half of the cooked sausage crumbles to a small plate (to scatter across the top of the pizza later), leaving the remaining sausage and all rendered fat in the skillet.
Step 3: Build the Country Sausage Gravy
Reduce the skillet heat to medium. You should have approximately 2 tablespoons of rendered pork fat in the pan with the remaining sausage.Sprinkle 2 tablespoons of all-purpose flour evenly over the sausage and fat.
Cook, stirring constantly with your wooden spoon, for 2 full minutes. The flour will coat the meat and absorb the fat, cooking out raw starch flavor and turning pale golden.
Slowly pour in 1 1/2 cups of warm whole milk in a thin, steady stream while whisking or stirring continuously.
Add 1/4 teaspoon of kosher salt, 1/2 teaspoon of freshly cracked black pepper, and a pinch of cayenne pepper.
Bring the liquid to a gentle boil over medium heat, stirring constantly to scrape up any browned fond from the bottom of the pan. Cook for 3 to 4 minutes until the gravy thickens into a rich, glossy sauce that heavily coats the back of a spoon. Remove from the heat and allow the gravy to cool to lukewarm for 10 minutes.
Step 4: Soft-Scramble the Eggs
In a medium mixing bowl, crack 6 large eggs. Add 2 tablespoons of cold water, 1/4 teaspoon of kosher salt, and 1/8 teaspoon of black pepper.Whisk vigorously for 30 seconds until the whites and yolks are fully homogenous and slightly frothy.
Melt 1 tablespoon of unsalted butter in an 8-inch nonstick skillet over medium-low heat until foaming.
Pour in the eggs. Let them sit undisturbed for 15 seconds until a thin layer sets on the bottom.
Using a silicone spatula, gently sweep the cooked edges toward the center of the pan, tilting the skillet to allow raw liquid egg to flow to the edges.
Continue this gentle motion for only 60 to 75 seconds. Remove the pan from the heat while the eggs are still very wet, glossy, and custardy (about 70% cooked). Transfer immediately to a clean plate to stop the cooking process. Set aside.
Step 5: Preheat the Oven and Stone
Position an oven rack in the bottom third of your oven. Place your pizza stone, baking steel, or an inverted heavy baking sheet directly on the rack.Preheat the oven to 475°F (245°C) for at least 30 to 45 minutes to ensure the stone absorbs maximum thermal energy.
Step 6: Shape and Par-Bake the Crust
Dust a pizza peel, wooden cutting board, or rimless baking sheet with 1 tablespoon of fine yellow cornmeal.Place the room-temperature dough in the center. Using your hands, press down from the center outward, flattening the dough into a 12-to-14-inch circle, leaving a slightly thicker 1/2-inch lip around the outer perimeter to form the crust rim (cornicione).
Gently shake the peel to confirm the dough slides freely over the cornmeal.
Using a dinner fork, lightly prick the interior surface of the dough all over (about 15 to 20 times), avoiding the outer rim.
Brush the outer rim lightly with 1 tablespoon of extra virgin olive oil.
Carefully slide the plain dough directly onto the screaming-hot pizza stone in the oven.
Bake for 5 to 6 minutes. The crust should puff, with the bottom setting firm and the surface turning dry and very faintly golden. Remove the par-baked crust from the oven using your peel and place on a heat-safe surface.
Step 7: Assemble the Pizza
Ladle roughly 3/4 cup to 1 cup of the warm country sausage gravy onto the center of the par-baked crust.Using the back of the ladle or an offset spatula, spread the gravy outward in an even layer, leaving a 1/2-inch bare border around the edge. You want an even coat; do not pile it too thick.
Evenly scatter half of the shredded cheese mixture (about 1 1/4 cups total of the cheddar and mozzarella) over the gravy.
Using your fingers, gently distribute the soft scrambled egg curds across the cheese layer in small, even clusters.
Scatter the reserved browned sausage crumbles and the crisp chopped bacon evenly over the egg layer.
Top with the remaining 1 1/4 cups of shredded cheese, making sure cheese covers the edges of the eggs to protect them from direct scorching heat.
Step 8: Final Bake to Bubbly Perfection
Slide the assembled pizza back onto the hot pizza stone in the 475°F (245°C) oven.Bake for 7 to 9 minutes.
Watch closely through the oven window during the final 2 minutes:
- The cheese should be completely melted, bubbling vigorously, with golden-brown spots forming across the surface.
- The outer crust rim should turn deep golden brown, blistered, and crisp.
Step 9: Garnish, Rest, and Slice
Remove the pizza from the oven and transfer it onto a wooden cutting board or pizza peel. Do not slice the pizza immediately.Allow the pizza to rest undisturbed for 4 to 5 minutes. This resting phase allows the molten cheese and sausage gravy to settle and firm up slightly; if sliced boiling-hot, the toppings will slide off the crust.
Scatter 3 thinly sliced green onions evenly over the top for a fresh, crisp, sharp allium finish.
Using a sharp rolling pizza wheel, cut the pizza into 8 generous triangular slices. Serve warm with freshly brewed coffee or hot sauce on the side.
Critical Mistakes and How to Avoid Them
The Crust is Doughy and Wet Under the Gravy
- The Cause: Skipping the par-bake step, or applying hot, boiling gravy directly onto raw dough.
- The Solution: Always par-bake the plain docked crust at 475°F for 5 to 6 minutes until set and dry. Allow the gravy to cool to lukewarm before spreading.
The Scrambled Eggs are Dry, Spongy, and Weep Water
- The Cause: Fully cooking the scrambled eggs on the stovetop before baking the pizza.
- The Solution: Pull the eggs off the stove when they are 70% cooked—still wet, shiny, and loose. The oven heat will finish cooking them gently without drying them out.
The Pizza is Greasy with Orange Oil Pooling on Top
- The Cause: Using 100% pre-shredded cheddar cheese, or not draining rendered fat from the cooked sausage and bacon.
- The Solution: Always blend 60% sharp cheddar with 40% whole-milk mozzarella. Grate cheese fresh from solid blocks, and drain excess grease from your cooked meats before topping the pizza.
Variations and Recipe Customizations
Storage, Freezing, and Reheating Science
Breakfast pizza makes phenomenal leftovers, retaining its structure when reheated properly.
Refrigerator Storage
Allow leftover pizza slices to cool completely to room temperature for no longer than 1 hour. Stack slices separated by sheets of parchment paper and store in an airtight container or wrap tightly in aluminum foil. Refrigerate at 38°F (3°C) or colder for up to 3 days.Freezing Guidelines
Wrap individual cold slices tightly in plastic wrap, then wrap in heavy aluminum foil. Freeze for up to 2 months. Thaw overnight in the refrigerator before reheating.Reheating Instructions
Never microwave leftover breakfast pizza; the microwave heats water molecules rapidly, turning the crispy crust soft, soggy, and rubbery while overcooking the eggs.- Skillet Method (Best Bottom Crust): Place a cold slice in a dry nonstick or cast-iron skillet over medium-low heat. Cover the skillet with a lid or foil. Heat for 4 to 5 minutes. The pan recrisps the bottom crust, while trapped ambient steam melts the cheese and warms the eggs.
- Oven or Toaster Oven Method: Place slices on a baking sheet and heat in a preheated 375°F (190°C) oven for 8 to 10 minutes until the crust is crunchy and the cheese bubbles.
Nutritional Breakdown and Macros
Sausage and Cheddar Breakfast Pizza provides dense, complete animal protein, healthy dietary fats, and complex carbohydrates for sustained morning energy.
| Nutrient | Amount per Serving (1 Slice / 1/8 Pizza) | Daily Value (%) |
|---|---|---|
| Calories | 420 kcal | 21% |
| Protein | 21 g | 42% |
| Total Fat | 24 g | 31% |
| Saturated Fat | 11 g | 55% |
| Carbohydrates | 30 g | 11% |
| Dietary Fiber | 1.5 g | 5% |
| Sugars | 3 g | - |
| Sodium | 790 mg | 34% |
| Cholesterol | 175 mg | 58% |
| Potassium | 280 mg | 6% |
| Calcium | 260 mg | 20% |
| Iron | 2.6 mg | 14% |
Sausage and Cheddar Breakfast Pizza
Crisp, golden homemade pizza crust layered with rich country sausage gravy, soft scrambled eggs, browned breakfast sausage crumbles, melted sharp cheddar, and crispy bacon.
Macro Nutrition Profile (Per Serving)
Ingredients
Country Sausage Gravy Base
Scrambled Egg & Cheese Layer
Ingredient Substitutions
| Original Ingredient | Healthy Alternative |
|---|---|
| Animal protein | Firm tofu, tempeh, or organic chickpeas |
| Cooking fat | Extra virgin olive oil or grass-fed butter |
Instructions
Proof and Prep the Dough: Remove 1 pound of pizza dough from the refrigerator at least 1 hour before baking. Keep it covered in an oiled bowl on the kitchen counter. Cold dough straight from the refrigerator contracts elastically and snaps back when stretched; bringing it to room temperature relaxes the gluten network, allowing you to stretch it thin without tearing.
Cook the Bacon and Brown the Sausage: Place 4 strips of thick-cut bacon in a large skillet over medium heat. Fry for 6 to 8 minutes, turning occasionally, until crisp and golden brown. Transfer the bacon to paper towels to drain, let cool, and chop into 1/2-inch pieces. In the same skillet (or a clean 10-inch skillet), add 8 ounces of bulk pork breakfast sausage over medium-high heat. Using a wooden spoon, break the sausage into small, bite-sized crumbles as it cooks. Sauté for 5 to 6 minutes until the meat is thoroughly browned and caramelized at the edges with no pink remaining. Using a slotted spoon, transfer approximately half of the cooked sausage crumbles to a small plate (to scatter across the top of the pizza later), leaving the remaining sausage and all rendered fat in the skillet.
Build the Country Sausage Gravy: Reduce the skillet heat to medium. You should have approximately 2 tablespoons of rendered pork fat in the pan with the remaining sausage. Sprinkle 2 tablespoons of all-purpose flour evenly over the sausage and fat. Cook, stirring constantly with your wooden spoon, for 2 full minutes. The flour will coat the meat and absorb the fat, cooking out raw starch flavor and turning pale golden. Slowly pour in 1 1/2 cups of warm whole milk in a thin, steady stream while whisking or stirring continuously. Add 1/4 teaspoon of kosher salt, 1/2 teaspoon of freshly cracked black pepper, and a pinch of cayenne pepper. Bring the liquid to a gentle boil over medium heat, stirring constantly to scrape up any browned fond from the bottom of the pan. Cook for 3 to 4 minutes until the gravy thickens into a rich, glossy sauce that heavily coats the back of a spoon. Remove from the heat and allow the gravy to cool to lukewarm for 10 minutes.
Soft-Scramble the Eggs: In a medium mixing bowl, crack 6 large eggs. Add 2 tablespoons of cold water, 1/4 teaspoon of kosher salt, and 1/8 teaspoon of black pepper. Whisk vigorously for 30 seconds until the whites and yolks are fully homogenous and slightly frothy. Melt 1 tablespoon of unsalted butter in an 8-inch nonstick skillet over medium-low heat until foaming. Pour in the eggs. Let them sit undisturbed for 15 seconds until a thin layer sets on the bottom. Using a silicone spatula, gently sweep the cooked edges toward the center of the pan, tilting the skillet to allow raw liquid egg to flow to the edges. Continue this gentle motion for only 60 to 75 seconds. Remove the pan from the heat while the eggs are still very wet, glossy, and custardy (about 70% cooked). Transfer immediately to a clean plate to stop the cooking process. Set aside.
Preheat the Oven and Stone: Position an oven rack in the bottom third of your oven. Place your pizza stone, baking steel, or an inverted heavy baking sheet directly on the rack. Preheat the oven to 475°F (245°C) for at least 30 to 45 minutes to ensure the stone absorbs maximum thermal energy.
Shape and Par-Bake the Crust: Dust a pizza peel, wooden cutting board, or rimless baking sheet with 1 tablespoon of fine yellow cornmeal. Place the room-temperature dough in the center. Using your hands, press down from the center outward, flattening the dough into a 12-to-14-inch circle, leaving a slightly thicker 1/2-inch lip around the outer perimeter to form the crust rim (cornicione). Gently shake the peel to confirm the dough slides freely over the cornmeal. Using a dinner fork, lightly prick the interior surface of the dough all over (about 15 to 20 times), avoiding the outer rim. Brush the outer rim lightly with 1 tablespoon of extra virgin olive oil. Carefully slide the plain dough directly onto the screaming-hot pizza stone in the oven. Bake for 5 to 6 minutes. The crust should puff, with the bottom setting firm and the surface turning dry and very faintly golden. Remove the par-baked crust from the oven using your peel and place on a heat-safe surface.
Assemble the Pizza: Ladle roughly 3/4 cup to 1 cup of the warm country sausage gravy onto the center of the par-baked crust. Using the back of the ladle or an offset spatula, spread the gravy outward in an even layer, leaving a 1/2-inch bare border around the edge. You want an even coat; do not pile it too thick. Evenly scatter half of the shredded cheese mixture (about 1 1/4 cups total of the cheddar and mozzarella) over the gravy. Using your fingers, gently distribute the soft scrambled egg curds across the cheese layer in small, even clusters. Scatter the reserved browned sausage crumbles and the crisp chopped bacon evenly over the egg layer. Top with the remaining 1 1/4 cups of shredded cheese, making sure cheese covers the edges of the eggs to protect them from direct scorching heat.
Final Bake to Bubbly Perfection: Slide the assembled pizza back onto the hot pizza stone in the 475°F (245°C) oven. Bake for 7 to 9 minutes. Watch closely through the oven window during the final 2 minutes: The cheese should be completely melted, bubbling vigorously, with golden-brown spots forming across the surface. The outer crust rim should turn deep golden brown, blistered, and crisp.
Garnish, Rest, and Slice: Remove the pizza from the oven and transfer it onto a wooden cutting board or pizza peel. Do not slice the pizza immediately. Allow the pizza to rest undisturbed for 4 to 5 minutes. This resting phase allows the molten cheese and sausage gravy to settle and firm up slightly; if sliced boiling-hot, the toppings will slide off the crust. Scatter 3 thinly sliced green onions evenly over the top for a fresh, crisp, sharp allium finish. Using a sharp rolling pizza wheel, cut the pizza into 8 generous triangular slices. Serve warm with freshly brewed coffee or hot sauce on the side.
Tried this recipe?
Let us know how it turned out! Click a star below to leave a review and rate the recipe.
Storage & Freezing Tips
- Refrigerator: Store in an airtight container for up to 2 days. Keep the components separate if possible to preserve texture.
- Reheating: Reheat gently in a skillet on medium-low heat with a splash of olive oil or butter.
- Freezing: Freezing is not recommended for this dish because ingredients like eggs become soggy, rubbery, or mushy when defrosted.
Frequently Asked Questions
Can this recipe be prepared ahead of time?▼
Yes, this meal is excellent for weekly meal prep. Store components separately and assemble before serving.
Is this recipe gluten-free?▼
All ingredients used are naturally gluten-free. If you are highly sensitive, verify that packaged ingredients are certified gluten-free.
Tried this recipe?
Tag @stewartlucas on Instagram and hashtag it #nutriguide!
You Might Also Like

Stewart Lucas
Nutritionist & Recipe DeveloperStewart Lucas is a nutritionist and recipe developer representing the NutriGuide team. All recipes, nutritional values, and diet protocols published on this site are designed and audited by certified dietitians and clinical nutrition professionals to guarantee absolute accuracy.
Community Reviews
Please log in to leave a review.